 →
→ Simple Sourdough Ciabatta Bread
This post may contain affiliate links. Please read my disclosure policy.
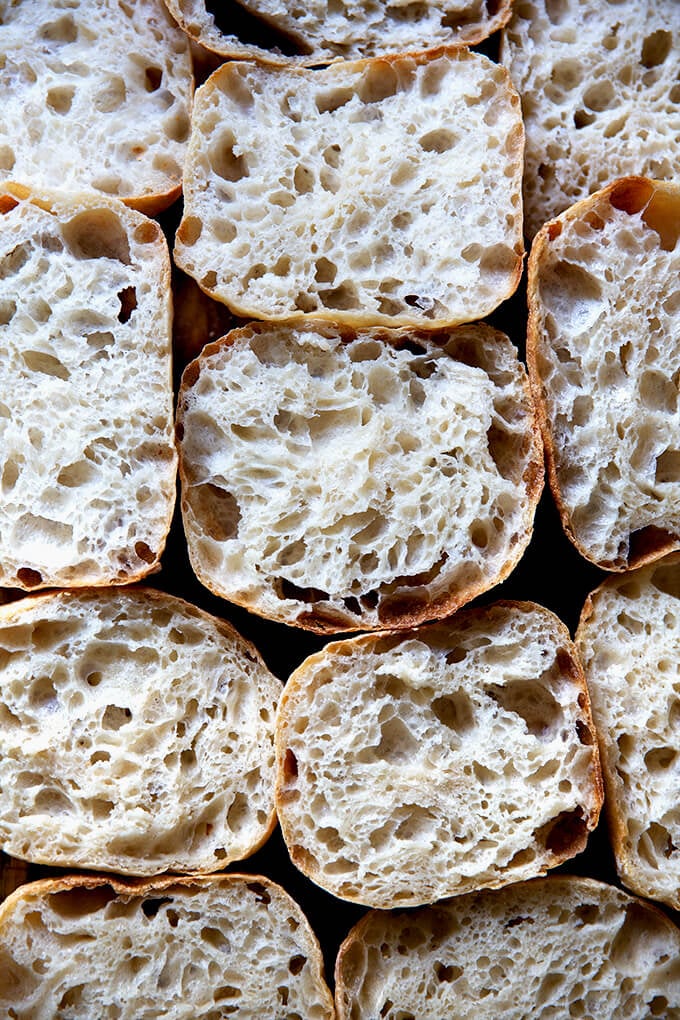
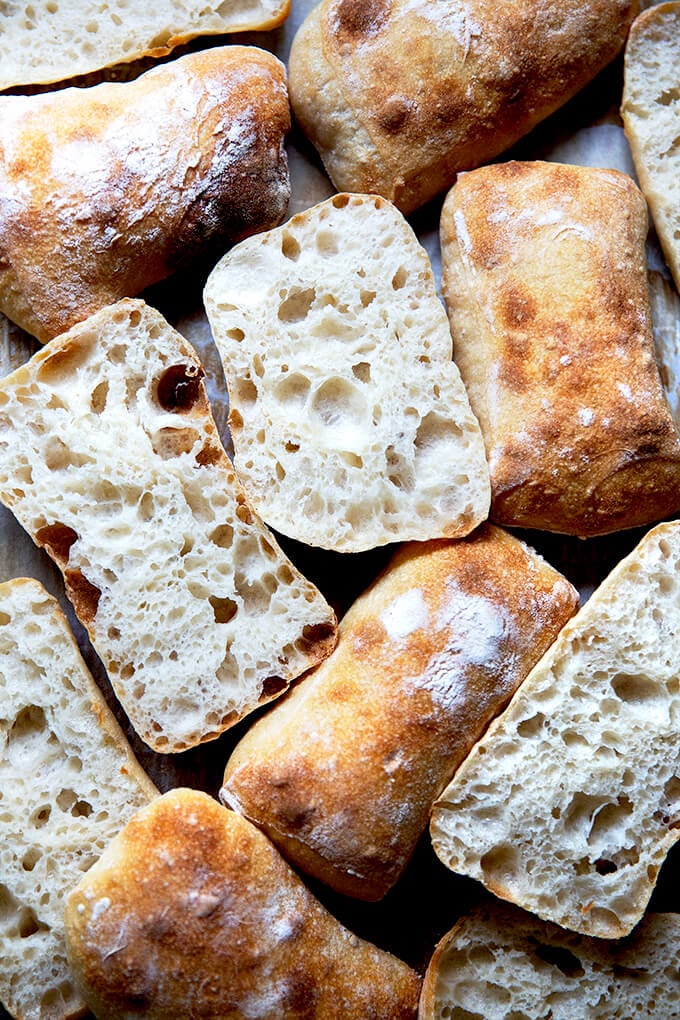
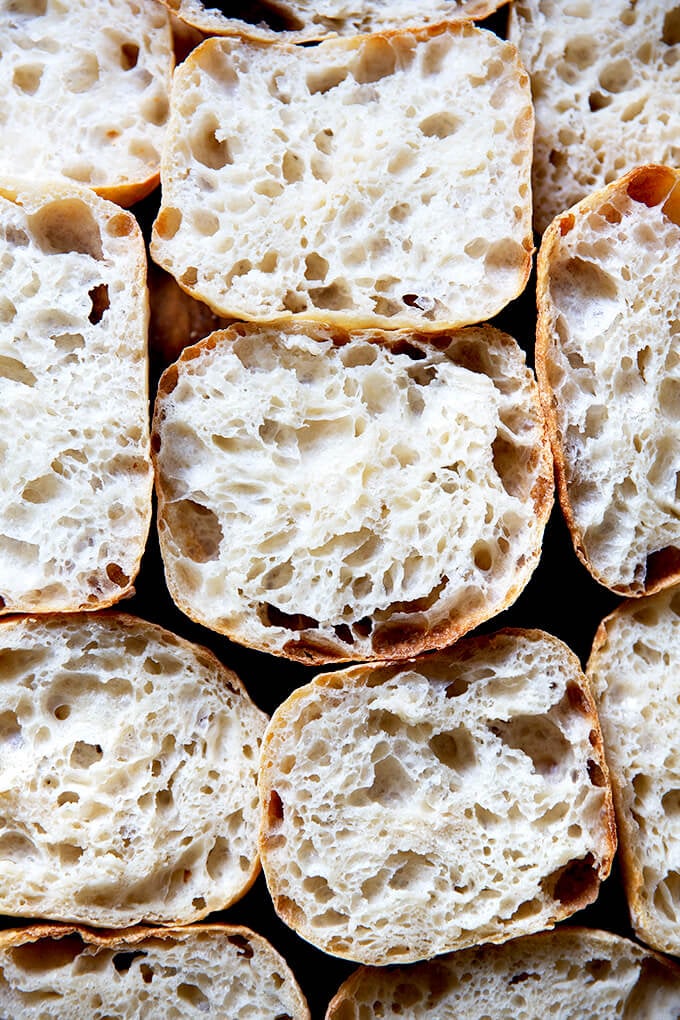
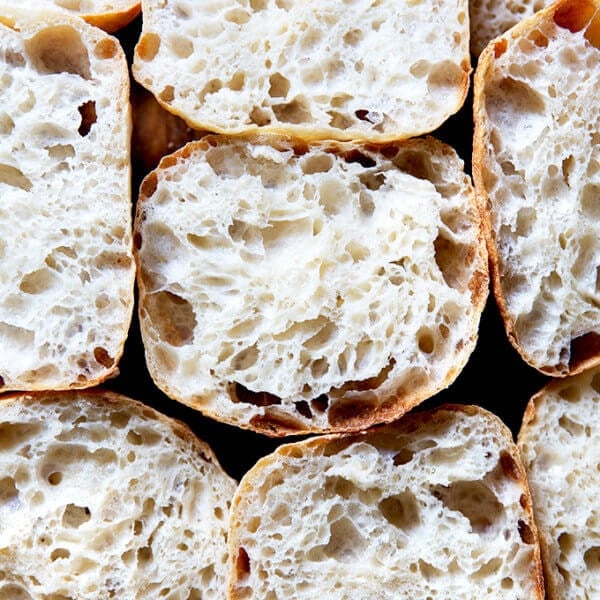
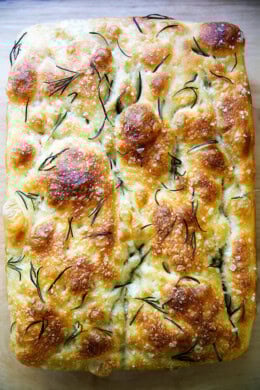
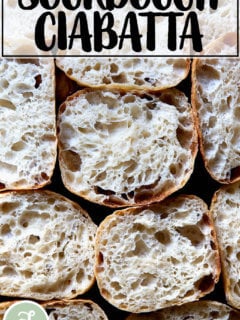
Made with four ingredients, this sourdough ciabatta has a crisp crust, a beautiful honeycomb crumb, and a lovely lightness and chew. The process is truly simple, and the ciabatta is so tasty, perfect for sandwiches of all kinds, for dunking into soup, or transforming into bruschetta.
Originating from the Lake Como region of northern Italy, ciabatta means “slipper” in Italian. Traditional ciabatta is characterized by its slipper shape and extremely porous, light texture, created with a biga (a preferment), a high-hydration dough, and a long, slow rise.
A biga is made with a small amount of yeast, flour, and water. In this recipe, I’ve replaced the biga with a sourdough starter, but kept the remaining elements the same: the high-hydration dough is made with four ingredients and requires a long, slow rise, which produces a crisp crust, a beautiful honeycomb crumb, and a lovely lightness and chew. This ciabatta is perfect for sandwiches.
Best of all: the process is truly simple. The dough does not require an autolyse, a preheated Dutch oven, or a baking stone. If you have a sheet pan, you’re good to go. What’s more, there’s no shaping, scoring, or balling up dough. After the bulk fermentation, you turn the dough out onto a floured work surface, pat it into a rectangle, and divide it into 8 pieces. You then transfer those pieces, irregularly shaped and all, to a sheet pan, and bake them one hour later.
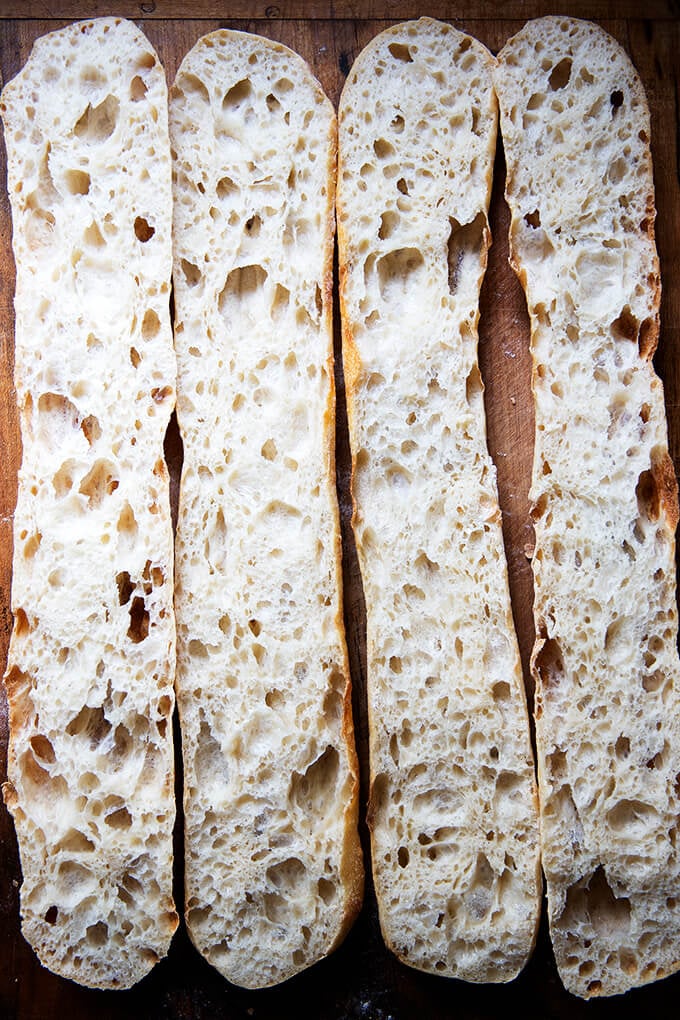
Can I tell you the most exciting part? This dough makes an excellent baguette! Unscored and flour-dusted, it has a crumb and flavor better than any other I’ve attempted previously. See photos below.
PS: If sourdough isn’t your thing, please try this yeast-leavened ciabatta bread recipe.
How to Make Sourdough Ciabatta, Step by Step
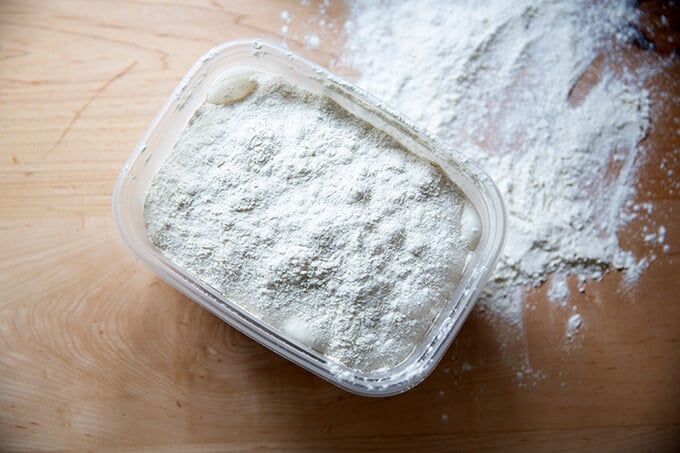
Gather your ingredients: bread flour, water, salt, and a sourdough starter. I am a proponent of buying a starter (see recipe box for sources), but if you are up for it, you can build a starter from scratch in just about 1 week.
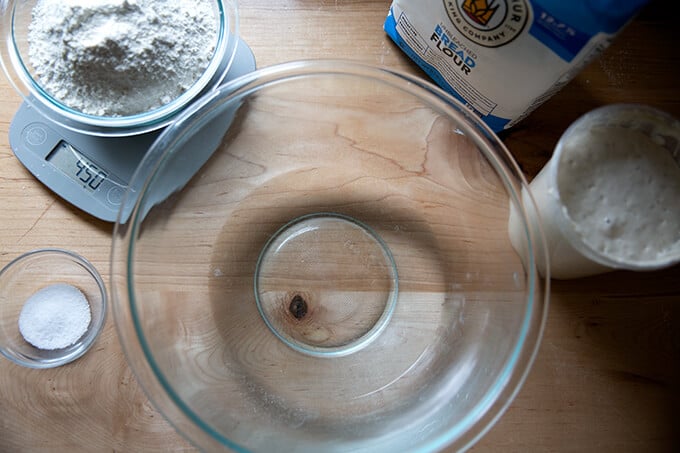
For this recipe, you’ll need: 100 grams sourdough starter, 360 grams water, 450 grams flour, and 12 grams salt. It’s 80% hydration.
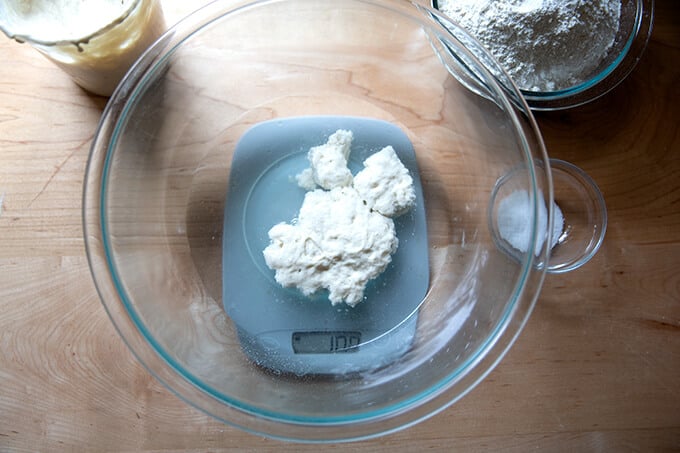
Mix together the water, sourdough starter, and salt.
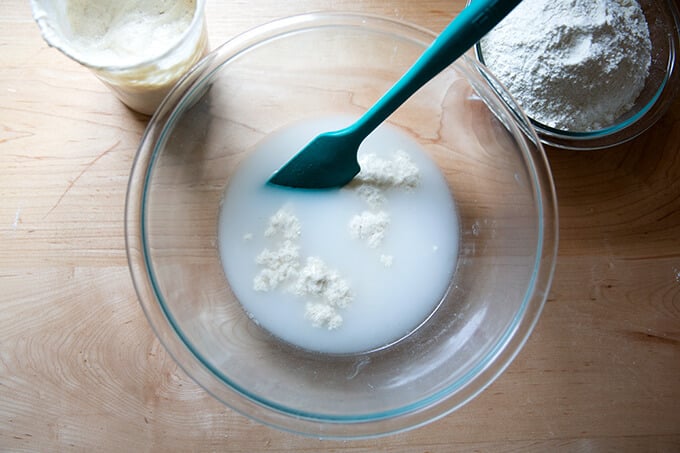
Add the flour and mix to form a sticky dough ball.
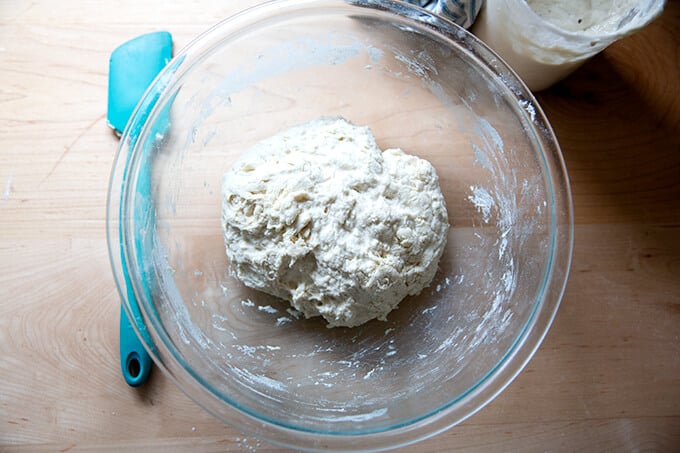
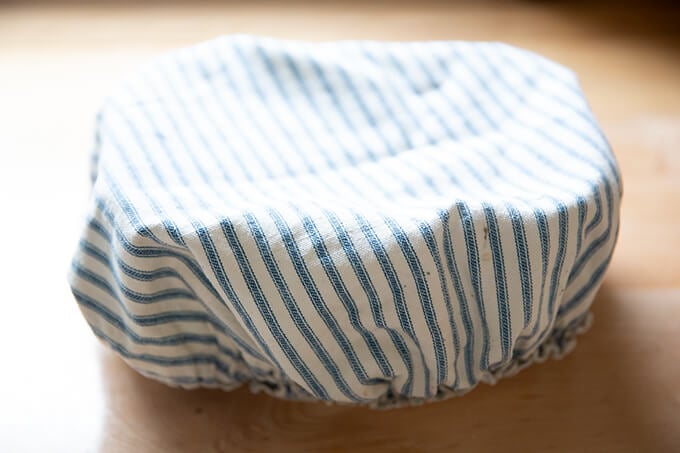
Cover the bowl and let rest for 30 minutes. Then perform a set of stretches and folds. See the video above or in the recipe box for guidance. This is what the dough will look like after one set of stretches and folds.
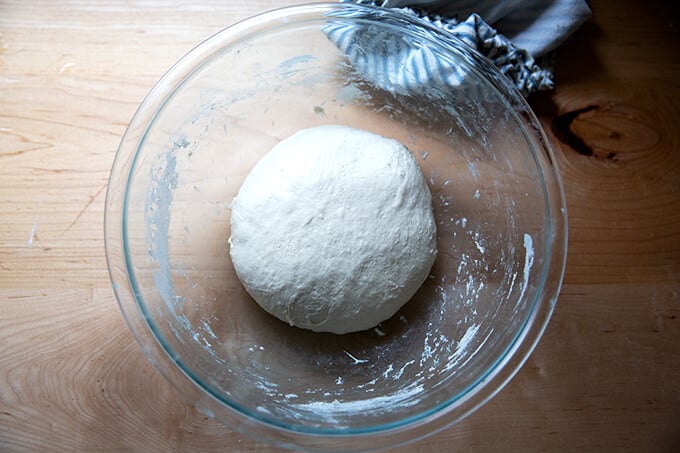
This is what the dough will look like after 4 sets of stretches and folds.
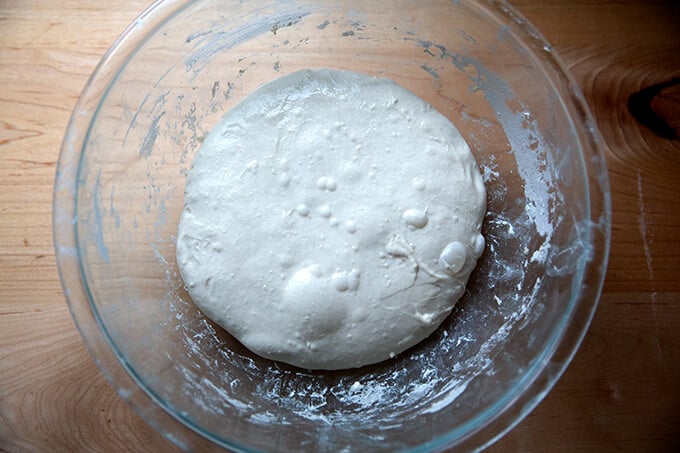
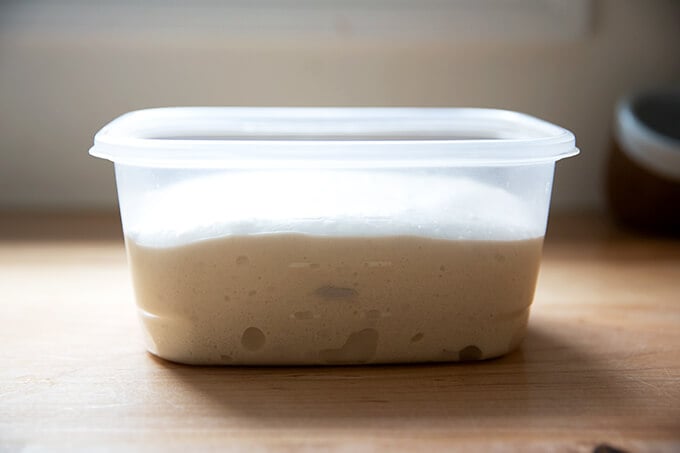
Transfer dough to a straight-sided vessel (this one is 8 cups, but anything similarly sized will do) for the bulk fermentation (the first rise):
Mark the height of the dough on the vessel, cover the vessel, and let the dough rise until it increases in volume by roughly 75%.
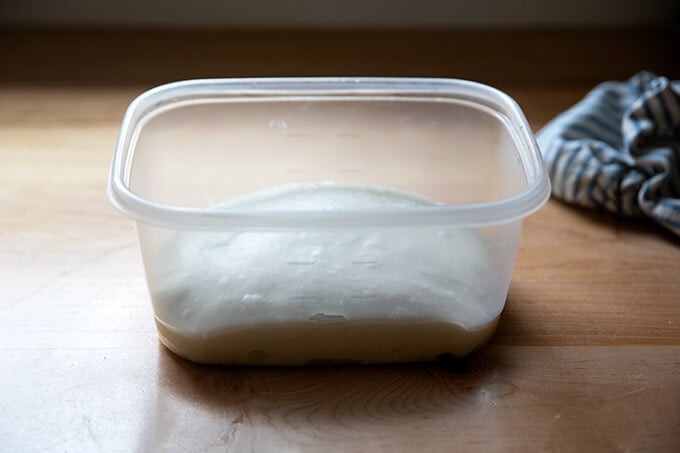
When the dough has increased by 75% (roughly), place a lid on the vessel, and transfer it to the fridge for 12-24 hours.
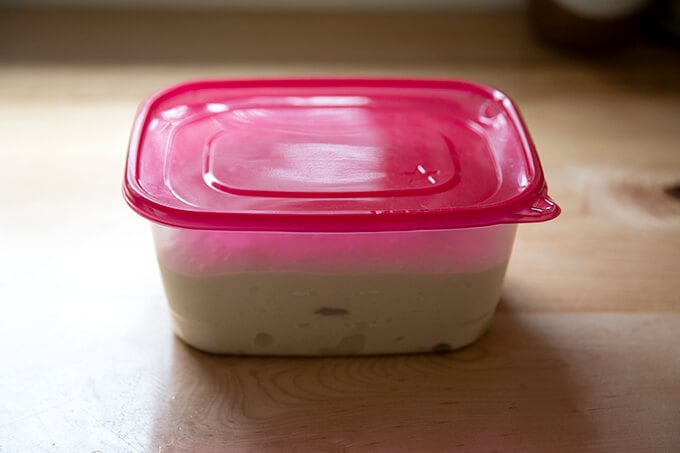
When ready to bake, remove the vessel from the fridge.
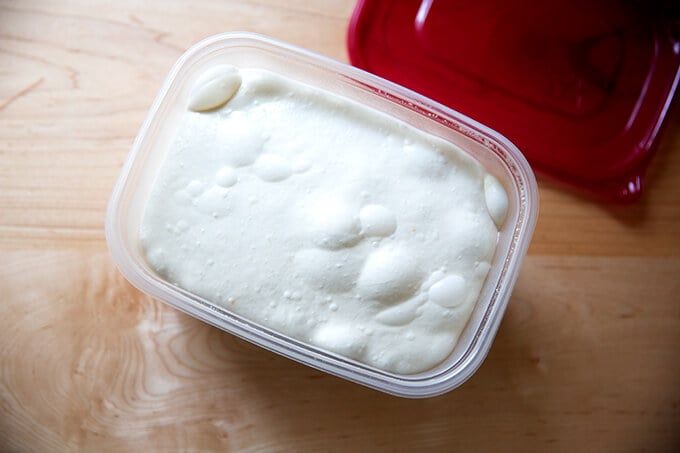
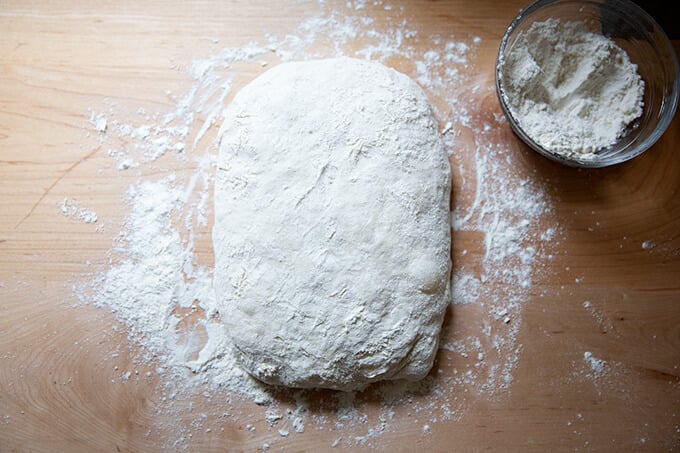
Dust the top of the dough liberally with flour. Dust a work surface liberally with flour, too.
Turn the dough out onto the prepared work surface.

Pat the dough into a rectangle.
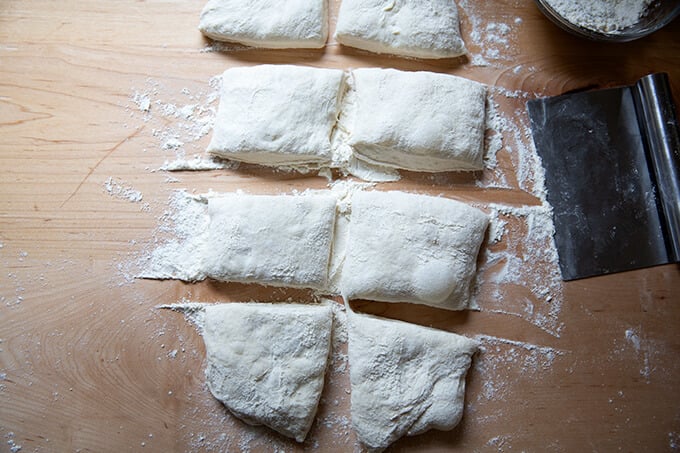
Cut the rectangle into 8 roughly equal portions.
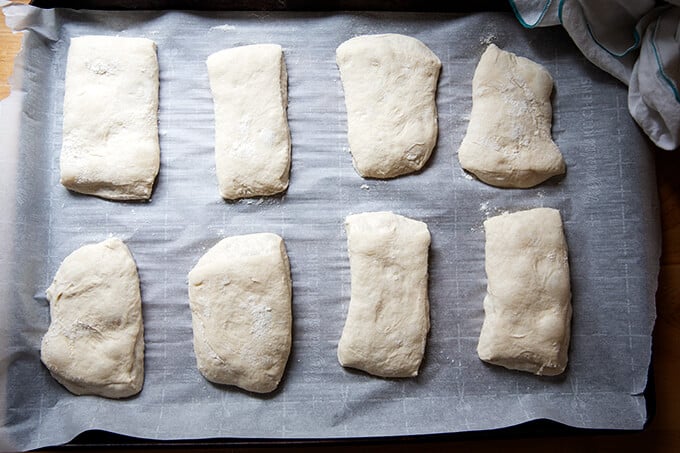
Transfer the portions to a parchment-lined sheet pan. Let rest for 1 hour. Then transfer to a 475ºF oven for 10 minutes. Lower the heat to 450ºF and bake for 10 minutes more.
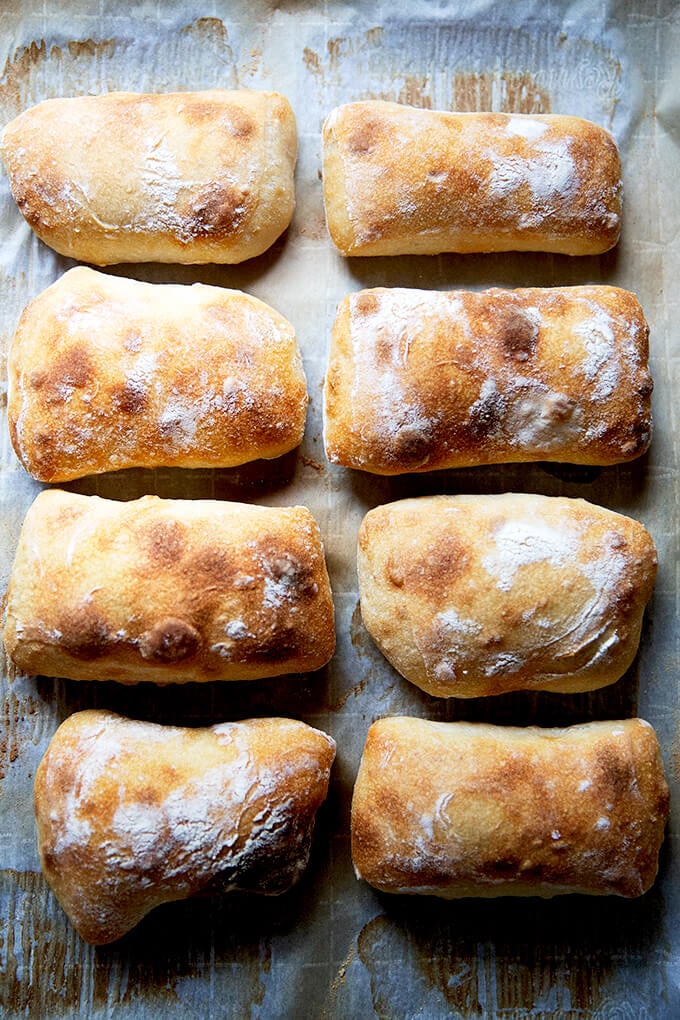
Transfer the rolls immediately to a cooling rack, and let cool for at least 20 minutes before cutting.
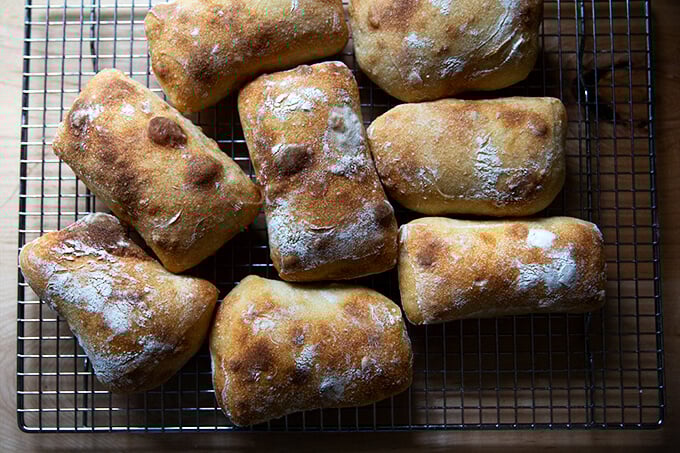

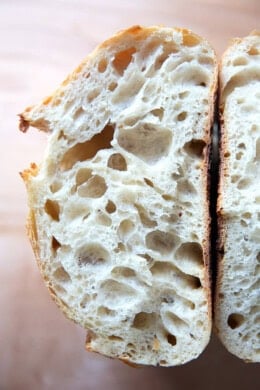
How pretty is that crumb?
Ciabatta sandwich: This recipe is inspired by Gabrielle Hamilton’s Blood, Bones, and Butter. In short, the success of the sandwich relies on a delicate balance: “the perfection of three fats together — butter, olive oil, and the white fat from prosciutto or lardo.” To make it, spread good bread with “cool waxy butter,” top with prosciutto (more than you think), and arugula. Drizzle it all with good olive oil.

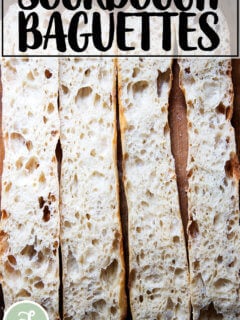
Sourdough Ciabatta “Baguettes” 🥖🥖🥖
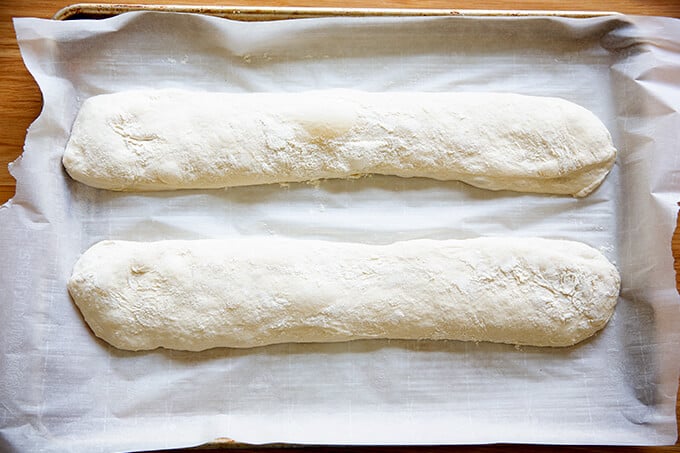
To make baguettes, follow the same process, but instead of dividing the rectangle of dough into 8 portions, divide it into two. I find an extra-large sheet pan to be necessary to bake both baguettes at the same time. If you don’t have an extra-large sheet pan, I would bake one baguette at a time, and orient it at a diagonal angle from one corner to another.
Bake the baguettes at the same temperature and for the same amount of time as the rolls.
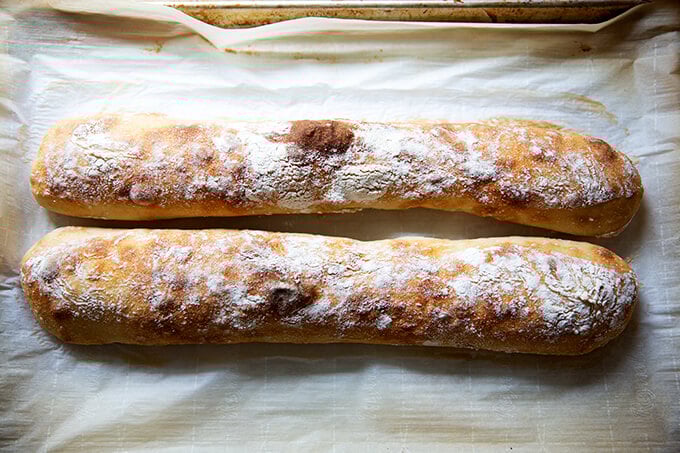
Not bad for the effort, right?

These ciabatta “baguettes” would be great vessels for giant sandwiches.
Simple Sourdough Ciabatta Bread
- Total Time: 24 hours 20 minutes
- Yield: 8 Rolls 1x
- Diet: Vegan
Description
Made with four ingredients, this sourdough ciabatta has a crisp crust, a beautiful honeycomb crumb, and a lovely lightness and chew. The process is truly simple, and the ciabatta is so tasty, perfect for sandwiches of all kinds, for dunking into soup, or transforming into bruschetta.
Notes:
- You need an active sourdough starter. You can build a starter from scratch in just about 1 week. But I am a huge proponent of buying a starter. Here are two sources:
- As always, I highly recommend investing in a digital scale before beginning any bread baking adventure.
Flour: I have had success using all-purpose flour, but if you can get your hands on bread flour, that is ideal, especially if you live in Canada or abroad. Moreover, if you live in Canada or abroad, you may need to reduce the water amount. Consider holding back some of the water during the mixing process to ensure you don’t end up with a soupy mess.
Straight-Sided Vessel:
- The vessel I use in this recipe, similar to this one, is 8 cups. Most grocery stores carry storage vessels similarly sized.
- Using a straight-sided vessel for the bulk fermentation will help prevent over-fermentation because it allows you to see when the dough has truly increased by 75% (or slightly more or less) in volume.
Ingredients
- 360 grams (about 1.5 cups) water
- 12 grams (about 2 teaspoons) salt
- 100 grams (about 1/2 cup) active sourdough starter, see notes above
- 450 grams (about 3.5 cups) bread flour, see notes above
Instructions
- Mix the dough: Place the water in a large bowl. Add the salt and stir briefly. Add the starter and stir briefly to incorporate. Add the flour, and stir until you have a wet, sticky dough ball. Knead briefly with your hands if necessary to incorporate the flour. Cover with a tea towel or cloth bowl cover and let sit for 30 minutes.
- Stretches and folds: With wet hands, grab one side of the dough, and pull up and to the center. Rotate the bowl a quarter turn, and repeat the grabbing and pulling. Do this until you’ve made a full circle. (Watch the video for more guidance. I do a few more pulls and turns in the video.) Cover the bowl. Repeat this process three more times at 30-minute intervals for a total of 4 sets of stretches and folds over the course of two hours. (In the video, I switch to coil folds for the last two sets of stretches and folds.)
- Bulk fermentation: Transfer the dough to a straight-sided vessel. Cover the vessel with a towel. Let rise at room temperature until the dough nearly doubles in volume (shoot for a 75% increase in volume). Times will vary depending on your environment and the strength of your starter. Recently, this has taken about 4 hours for me, but don’t worry if it takes longer for you. Cover vessel with a lid (ideally) or a towel (if you are using a towel, slick the top of the dough with oil to prevent it from drying out.) Transfer to fridge for 12-24 hours.
- Shape: Remove vessel from fridge. Remove lid. Sprinkle top of dough liberally with flour. Turn dough out onto a floured work surface. Pat dough into a rectangle. Sprinkle top with flour. Use a bench scraper to cut the dough in half vertically. Then make three cuts equally spaced in each half to create 8 small rectangles.
- Line a sheet pan with parchment paper. With floured hands, transfer each rectangle to the prepared pan, gently pulling outward. Cover the pan with a towel. Let stand for one hour.
- Bake: Heat oven to 475ºF. Transfer pan to oven and bake for 10 minutes. Lower heat to 450ºF, rotate pan, and bake for 10 minutes more. Remove pan from oven. Transfer ciabatta rolls to a cooling rack. Let cool for 20 to 30 minutes before slicing.
- Prep Time: 24 hours
- Cook Time: 20 minutes
- Category: Bread
- Method: Oven
- Cuisine: American, Italian
This post may contain affiliate links. Please read my disclosure policy.


844 Comments on “Simple Sourdough Ciabatta Bread”
I didn’t plan well and didn’t read directions fully beforehand. Do You have to do the bulk fermentation in the fridge? I was hoping to have them with dinner. Thanks
Hi Suzanne,
I’m likely too late here. You an skip the cold proof, but you likely won’t get as quite an airy a crumb. What did you end up doing?
I ended up putting them in the fridge overnight lol.
OK, great 🙂
I have used this recipe multiple times to make both rolls and baguettes, and I think it’s my all time favorite. I actually enjoy making this more than a loaf of traditional sourdough bread.
Great to hear, Clarrisa! Thanks so much for writing and sharing this 🙂
Excellent recipe! My ciabattas came out perfectly light and pillowy. My only change was leaving them an additional five minutes in the oven, but that may have been necessary only because of my particular oven. Italian husband gives them five stars!
Thank you!
Great to hear your Italian husband approves! Thanks so much for writing and sharing all of this 🙂
I love this recipe. I’ve made these twice now and they’ve come out perfect. My only problem is that I seem to wait too long to start making them, so i need to put the dough in the refrigerator overnight, then proof at room temperature the next day, then back into the refrigerator again. I’m just wondering what would happen if i didn’t cold proof them a second time? I don’t mind doing that because they come out great. Just curious. Thanks!
Hi Susan! To clarify, you refrigerate your dough during the bulk fermentation, then you refrigerate it again when the recipe instructs you to in step 3?
I think you could definitely try skipping the second cold proof — if you do, I think you’ll need to extend the room temperature proof of the cut rolls (to at least 2 hours, maybe 3). Be sure they are covered well while they proof at room temperature to ensure a crust doesn’t form on the dough while it rises.
Simple, easy to follow, turned out great!
Great to hear, Annabelle 🙂 Thanks for writing!
I LOVE this recipe Ali and so does everyone I have made it for!!! I have a friend who can’t eat white flour so wonder if there is a mix of spelt, wheat and possibly rye flour that could work? Would it be a 1-1 substitution? I’d love your input!
Aww, great to hear, Joanne 🙂 I think you could use 100% spelt flour here with success!
This worked out beautifully
For fellow Canadians – I used Robin Hood Bread flour and 350g water.
Great to hear, Della! Thanks so much for writing and sharing your notes.
First attempt! Pleased with this recipe. My oven is not to be trusted with temperature so I baked at 450° turning pan at 10 minute mark. Temp was 209° Perfect! Thanks for your wonderful recipe. It’s a keeper!
Great to hear, Colleen! Thanks so much for writing and sharing your notes 🙂
Literally in love!! So so easy, always perfect (just watch your rise and adjust for your own conditions- it’s cool and cloudy here today so took a lil longer..) but, we love them so much (and so do our neighbours.. that I always do a triple batch! 🤣 (and yes- daughter loves having sourdough ciabatta rolls for school lunches… and I love having the baguettes for garlic bread during the week!)
Awww, so nice to read all of this, Beck! Thanks so much for writing and sharing your notes — really appreciate you noting how conditions alter the timing. So glad your daughter approves too 🙂 🙂 🙂
Hi Alexandra, I’ve been baking the ciabatta rolls a few times now, they turn out quite close to yours. Although my oven doesn’t reach quite 475 F and the protein in the flour over here in South Africa is 12.2%.
Thank you for the suggestion of holding back some water. I hold back 20g.
Lovel recipe .
Cheers
Mary
Thank you for writing and sharing your notes, Mary! So helpful for others. And thanks for circling back to rate it, too 🙂 🙂 🙂
Its me again (Mary). forgt to rate it!
Definitely a fabulous recipe
Sounds like a wonderful recipe! I haven’t tried it yet, but I do have a question. What is the approximate size of the rectangle before cutting the ciabattas?
Hi! I’ve never measured, but I’m guessing something like 9×13 inches.
Thank you! That’s about what I guestimated.
I followed your recipe exactly, and the bread turned out superb! Of course, I think it needed maybe an extra hour of proofing after cutting, but that’s the nature of sourdough… a living thing that can be finicky! But the flavor was great, the outside crusty and crispy, the inside tender, I just didn’t get the openness of the crumb. I’ll be using this again, and adjust my times!
Great to hear, John! And I should definitely add some notes to the recipe about that final proof — I’m sure extending it would have gotten you a more open crumb. Thanks for writing 🙂
I don’t know if I have comment on this before or not. LOL Either way, worth another 5. Easy and yummy! Thank you!