 →
→ 

Simple Sourdough Focaccia: A Beginner’s Guide
 By Alexandra Stafford
—
Last Updated: 01/22/2026
By Alexandra Stafford
—
Last Updated: 01/22/2026
This post may contain affiliate links. Please read my disclosure policy.
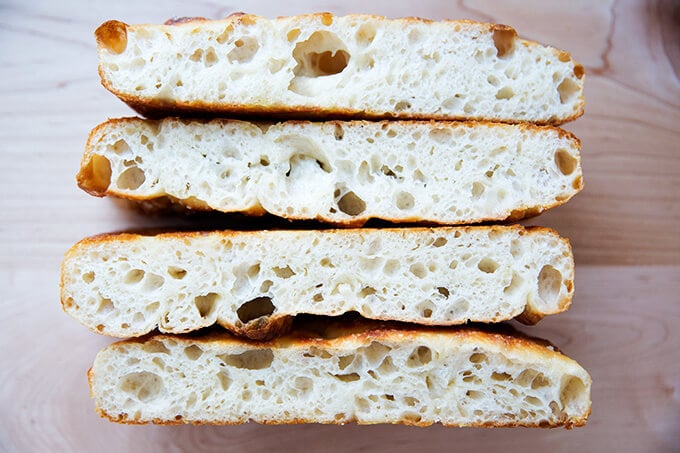
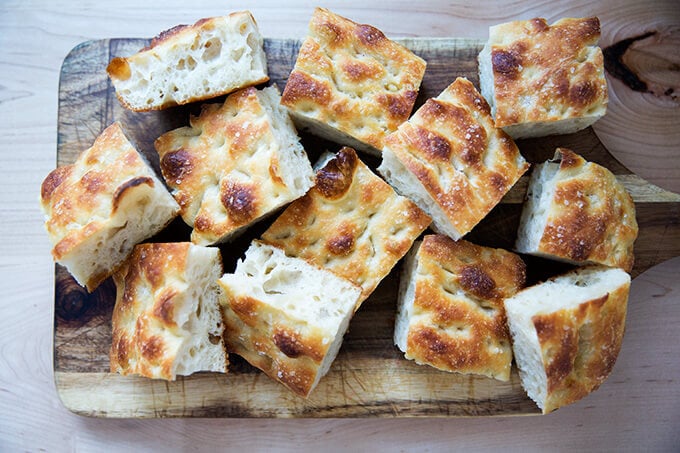
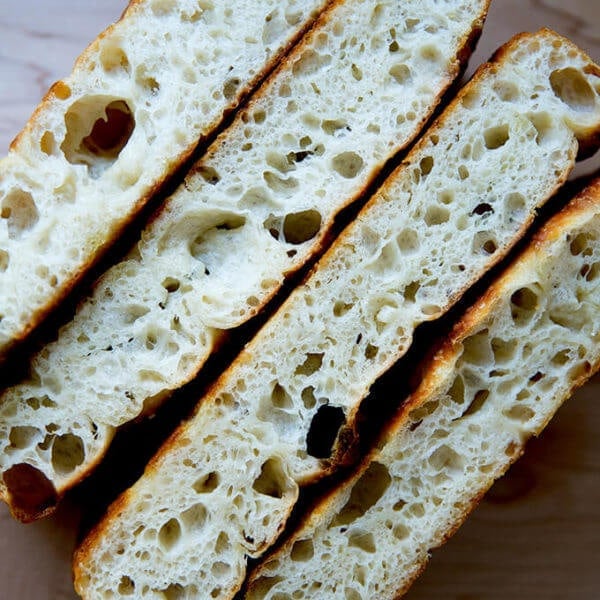
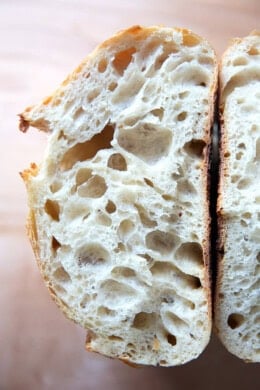
With its oil-crisped crust and light, bubbly crumb, sourdough focaccia is a delicious and versatile bread, perfect for sandwiches but also great as an appetizer and dinner bread. It’s also one of the easiest breads to make. Find step-by-step instructions on how to make this wildly popular bread below!
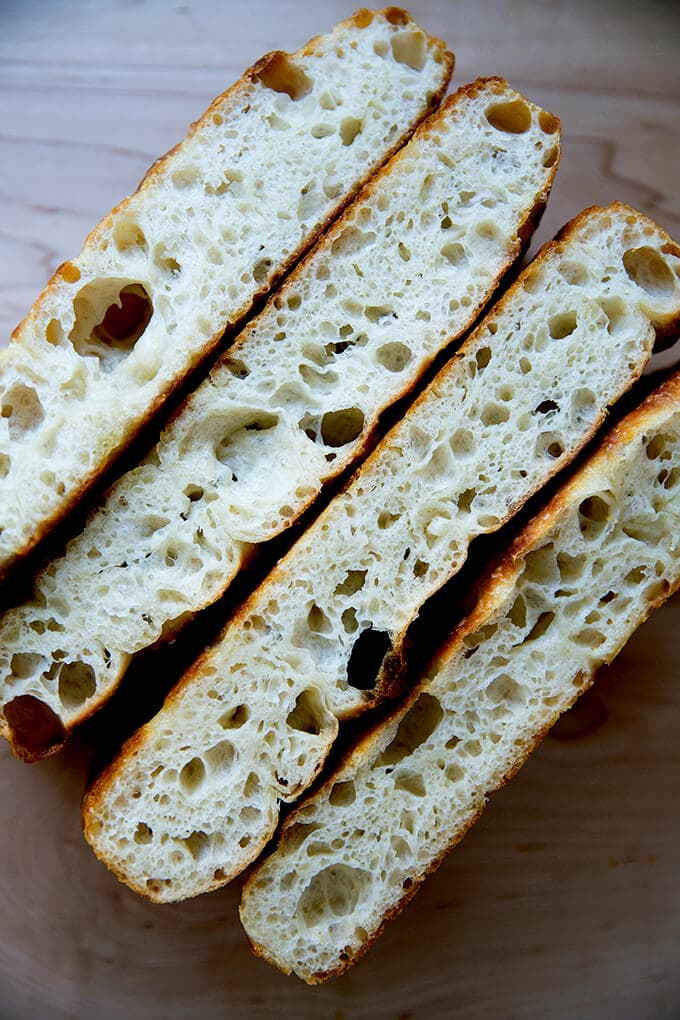
Adapted from my favorite yeasted, slow-rise focaccia recipe — overnight refrigerator focaccia — this sourdough focaccia recipe replaces the yeast with a sourdough starter. If you are interested in getting started with sourdough, focaccia is the ideal place to start.
Why? First, it requires no special equipment — not a Dutch oven or a Baking Steel. All you need is a 9×13-inch pan, which you likely own. Second, unlike sourdough boules, which require practiced shaping, sourdough focaccia requires nothing more than whisking, stirring, and sliding the dough into a pan. Third, it requires no scoring. With focaccia, you don’t need a razor-sharp lame — you use your fingers to dimple the dough.
Focaccia, sourdough or otherwise, is my favorite bread for so many reasons, namely its versatility — sandwiches, appetizers, dinner — but also its flavor and texture: the oil-crisped crust, the generous amount of salt, the chewy crumb. Learn to make it at home by following the simple guide below.
How to Make Sourdough Focaccia, Step by Step
First, wake up your starter by feeding it. If you don’t have a starter and don’t have a friend who can lend you one, I recommend buying one. When you are ready to feed your starter, discard most of it, down to a tablespoon or two, then add about 45 g flour…
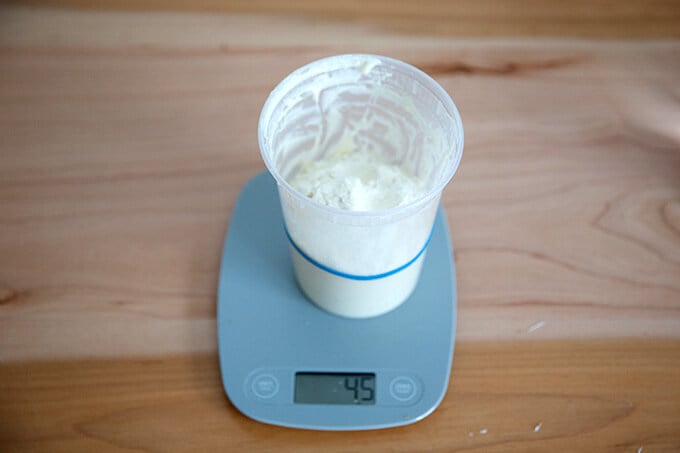
… and 45 g water. You don’t have to be exact, but when you’re getting started, I think it’s helpful to weigh both the water and flour. Depending on how long the starter has been in the fridge, it may need one or two feedings before use.
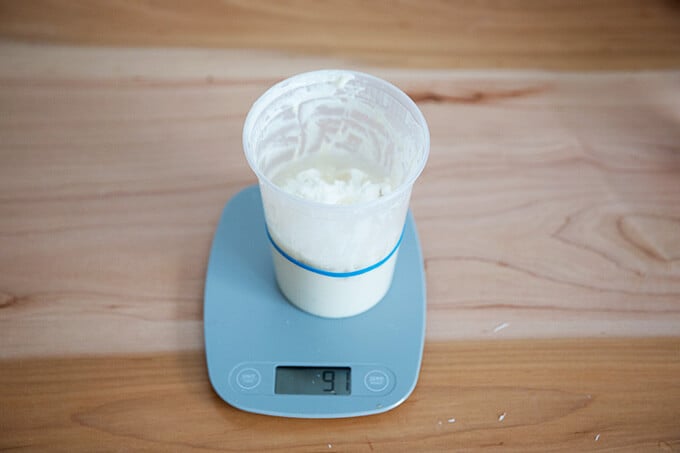
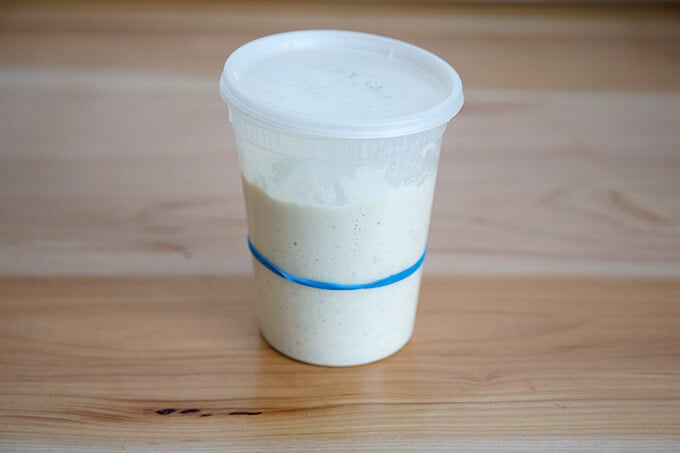
If you stick a rubber band around your starter vessel, you’ll know when …
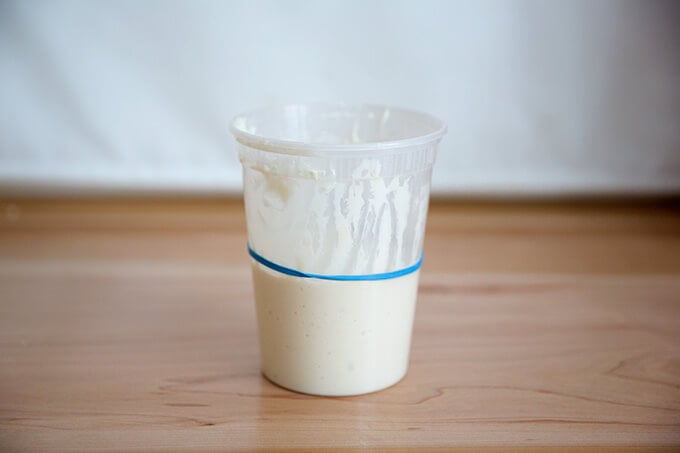
… it has doubled and is ready for use.
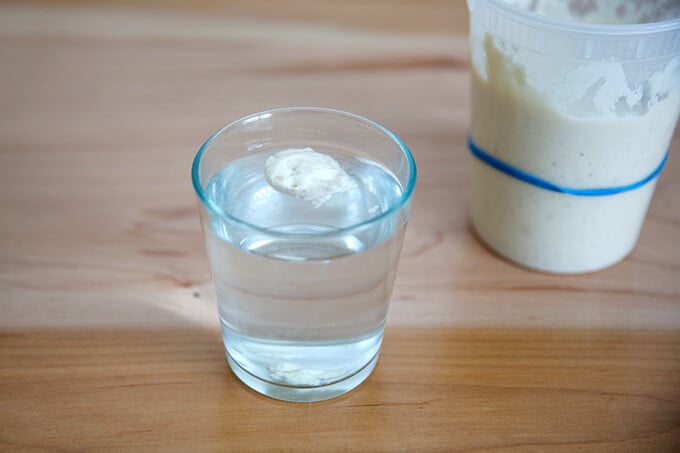
If you need reassurance as to if it’s ready, you can do the float test: drop a spoonful of starter into a glass of water. If it floats, it’s ready.
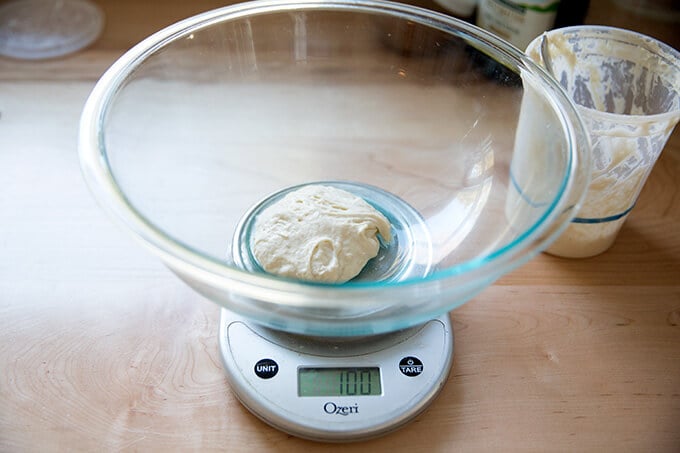
As with all bread, when mixing sourdough doughs, it’s best to weigh everything with a digital scale. Start with 100 g starter.
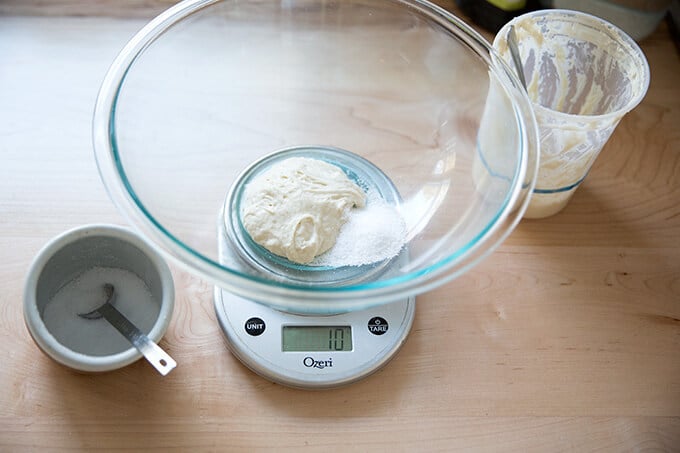
Add 10 g kosher (or other) salt.
Add 440 g water. (See recipe notes: If you live in a humid environment, you may want to use less.)
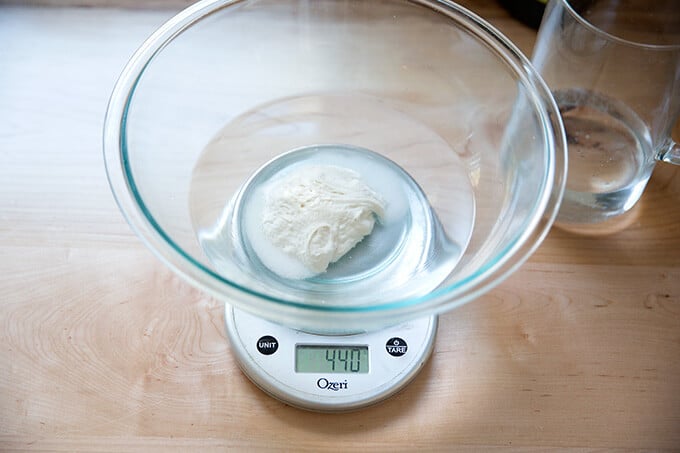
Stir to combine.
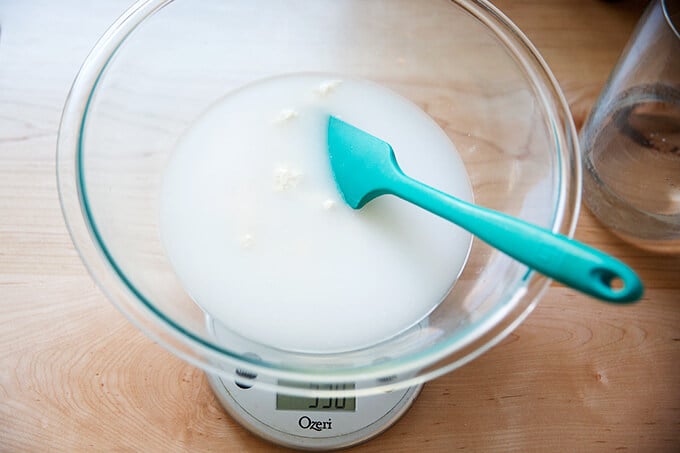
Add 512 g bread flour.
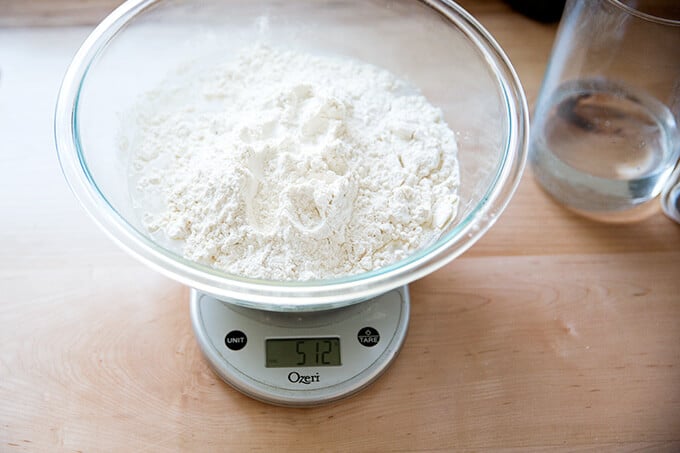
Stir to form a sticky dough ball.
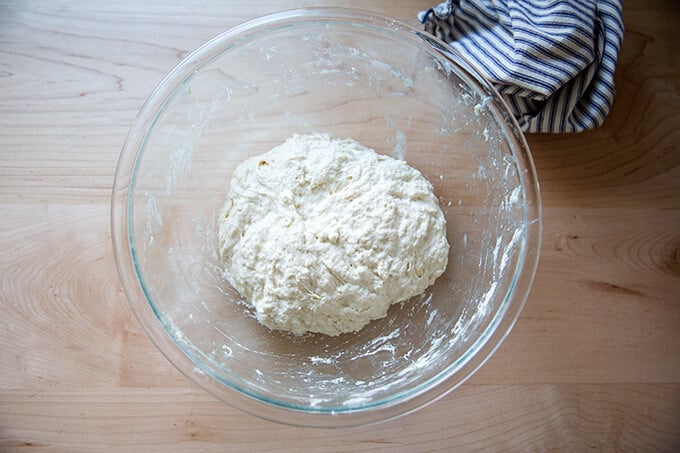
Cover with a towel or bowl cover, and let rise for 8 – 18 hours at room temperature (times will vary depending on the time of year and how warm your kitchen is … in the summer, this may take only 4 hours):
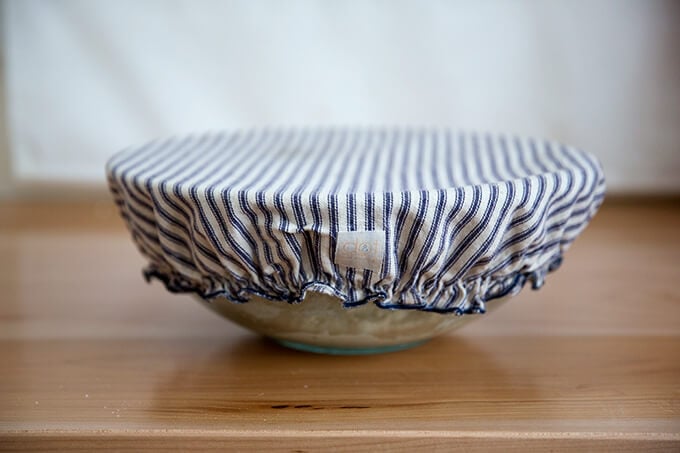
When it doubles …
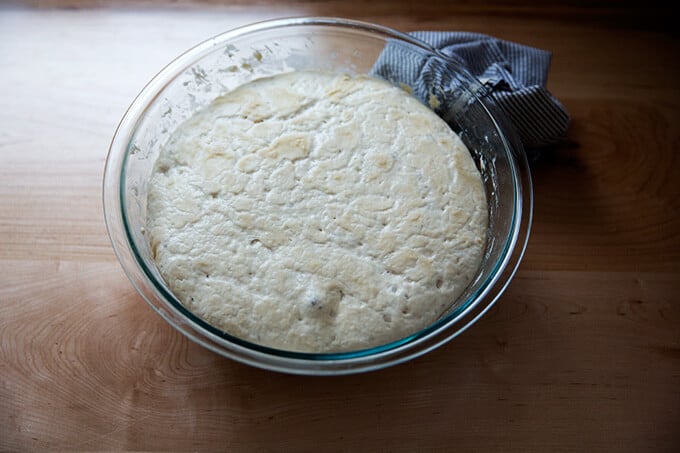
… drizzle it with some olive oil.
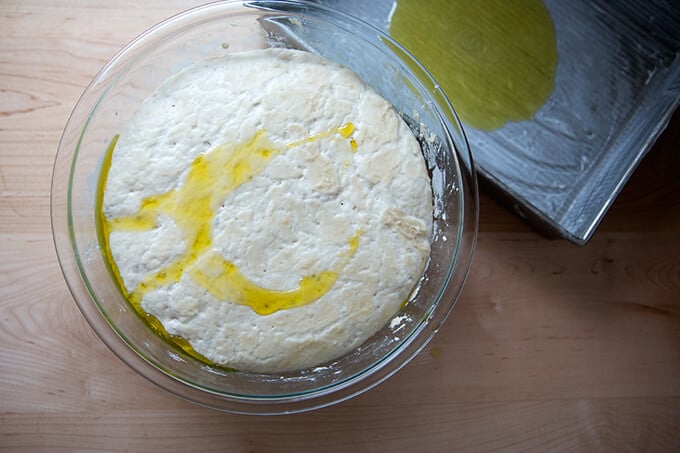
Deflate the dough by pulling the sides into the center.
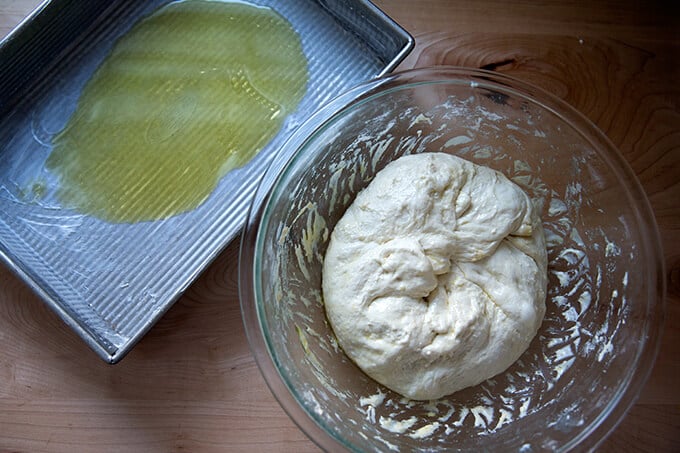
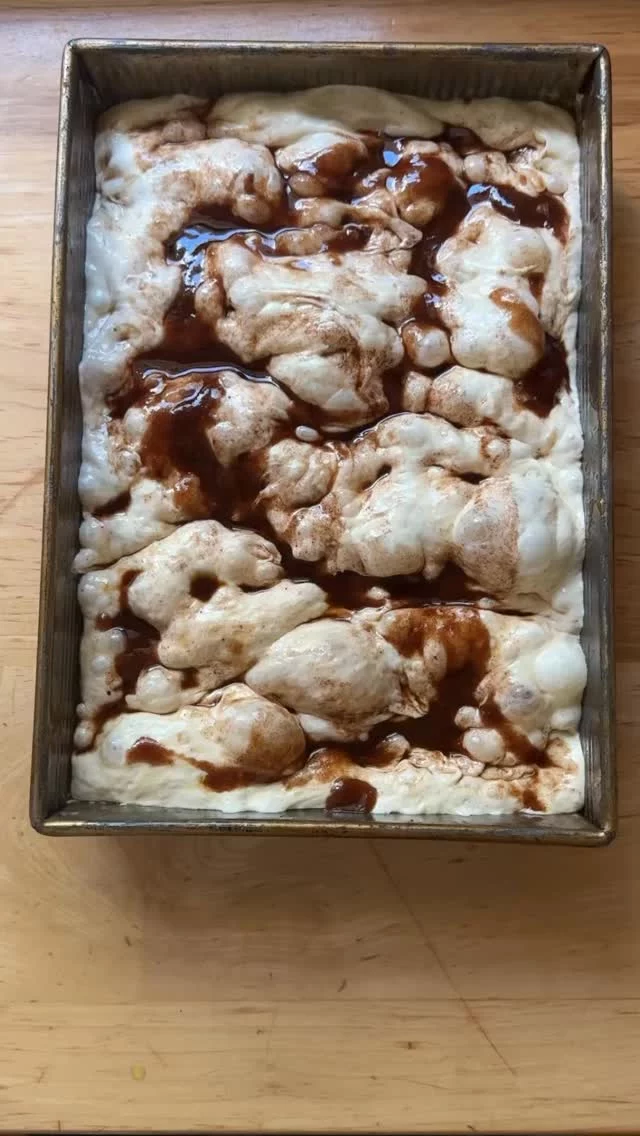
Dough, ready to make it’s second rise, which will take 5-6 hours. Love this USA Pan.
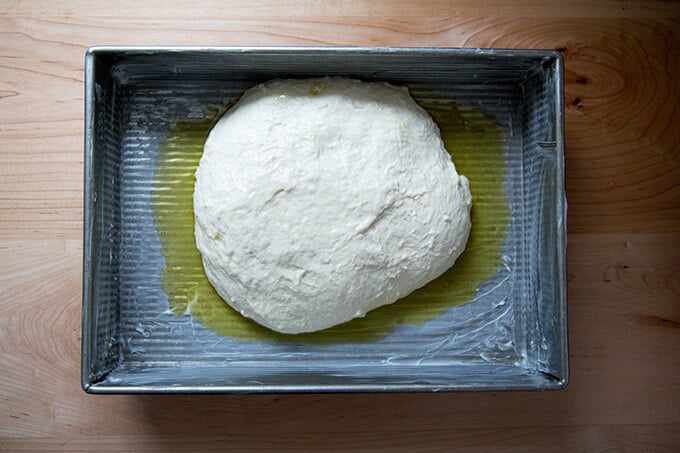
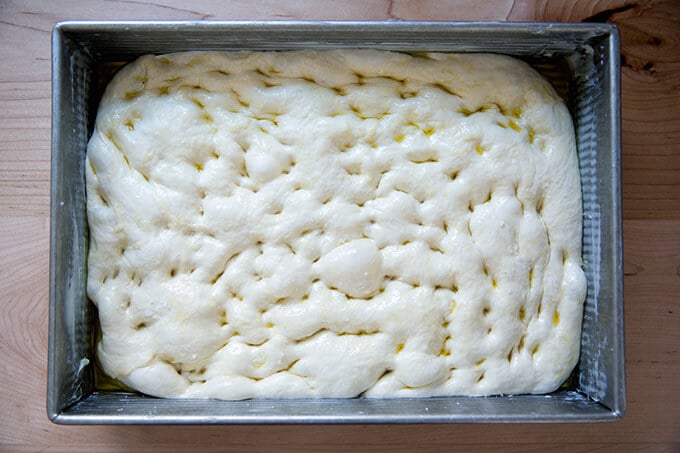
After 5-6 hours, the dough is ready to be dimpled and stretched and salted. Bake at 425ºF for 25 minutes.
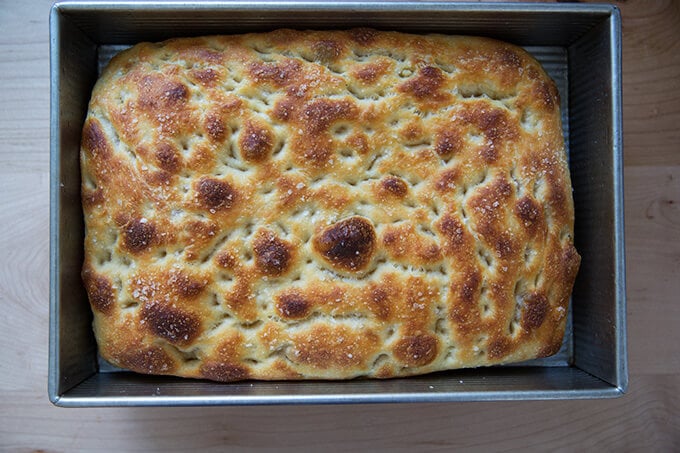
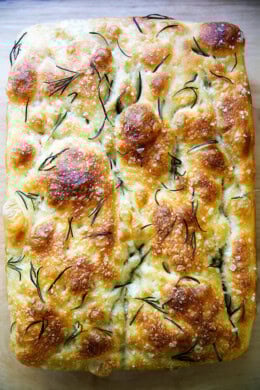
Just-baked sourdough focaccia:
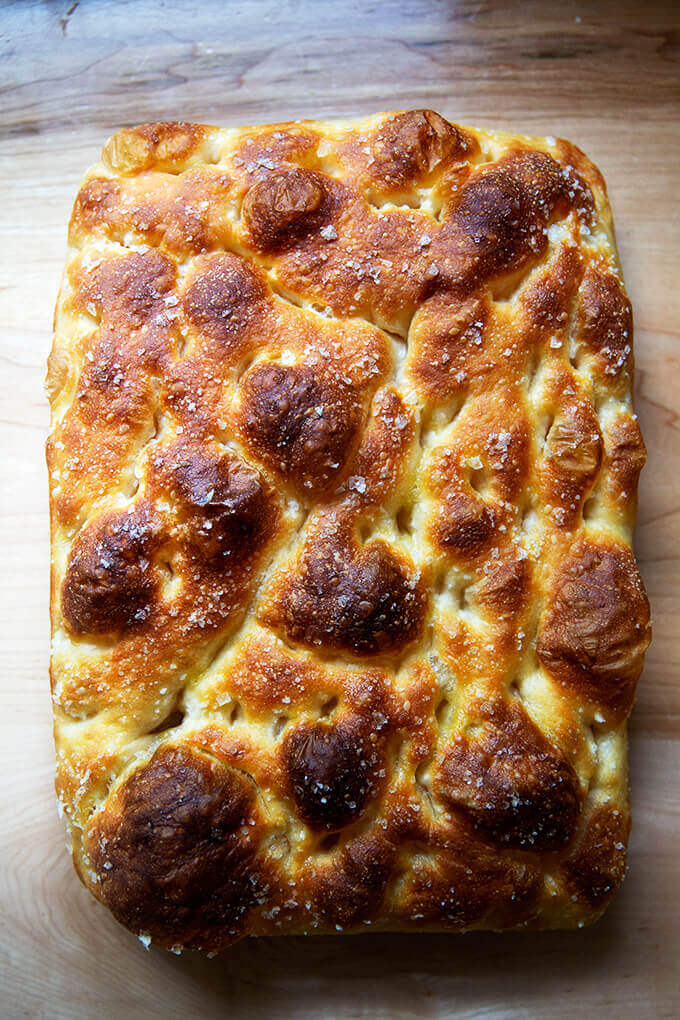
Simple Sourdough Focaccia
- Total Time: 24 hours 25 minutes
- Yield: 1 loaf 1x
Description
With its oil-crisped crust and light, bubbly crumb, sourdough focaccia is a delicious and versatile bread, perfect for sandwiches but also great as an appetizer and dinner bread. It’s also one of the easiest breads to make. Find step-by-step instructions on how to make this wildly popular bread below!
Notes:
Adapted from my favorite yeasted, slow-rise focaccia recipe — overnight refrigerator focaccia — this recipe replaces the yeast with a sourdough starter. Find video guidance and step-by-step instruction below.
What you need to make this recipe…:
- …a sourdough starter. You can buy one (from places like Breadtopia or King Arthur Flour) or you can make it yourself from scratch (a one- to two-week process).
- …time. Once your starter is ready to go, this recipe requires an initial 4- to 18-hour rise, followed by a second 4- to 6-hour second rise. After the initial rise (depending on the time of year and temperature of your kitchen), you can deflate the dough, and stick it in the fridge for 8 to 10 hours (maybe longer), which might help you regarding your schedule. Keep in mind, when you remove the dough from the fridge and transfer it to a pan, it will still need to rise for another 5- to 6- hours.
- …water. Chlorine in water can adversely affect sourdough. Leaving water at room temperature for 24 hours will allow most of the chlorine to escape. When I am in the habit of making sourdough bread, I fill a large pitcher with water and leave it out at room temperature. I use this for my sourdough breads and starter. Truth be told, I’ve used water straight from the tap and have not noticed a difference.
- …mixing/rising vessels. I love this 4-quart bowl + lid set for mixing and rising all sorts of dough. With sourdough, I love using a straight-sided vessel for the bulk fermentation, which allows me to see precisely how much my dough has increased in volume.
Water quantity: Depending on where you live and the time of year, you may need to cut the water back. If you live in a humid environment, for instance, I would suggest starting with 430 g water. If you are not using bread flour, you also may need to cut the water back a bit.
Timing:
The more I make sourdough, the more I realize so much depends on the time of year and the temperature of my kitchen. In the summer, because it is so warm, the first rise (bulk fermentation) takes between 4 – 6 hours; in the winter the first rise takes 12 – 18 hours.
This recipe’s key is to ensure the first rise doesn’t go too long — you want the dough to nearly double. A straight sided vessel (as opposed to a bowl) makes gauging the first rise easier. (Note: If your dough rises above double, don’t despair … recently my dough tripled in volume during an overnight rise, and the resulting focaccia was still delicious, light, airy, etc.)
A few thoughts: If you are making this focaccia in the summer (northern hemisphere), use 50 g of starter and check the dough every couple of hours. If you are making this in the winter, use 100 g of starter, and plan for a long first rise.
Troubleshooting: If you have issues with your dough being too sticky, please read this post: Why is my sourdough so sticky? The 4 common mistakes.
Flour choice:
- I’ve been using King Arthur Flour’s special patent flour — bought a 50-lb. bag of it at Restaurant Depot. Its protein content, 12.7%, is the same as the protein content of its bread flour. I also have used all-purpose flour (11.7%) with success, but I recommend bread flour, which seems to be more reliable for people especially those living in humid climates. If you only have ap flour on hand, you may consider reducing the water a bit — bread flour absorbs slightly more liquid than all-purpose flour.
Ingredients
- 50 g – 100 g (1/4 to 1/2 cup) active starter, see notes above
- 10 g (about 2.5 teaspoons) kosher salt
- 430 – 440 g water (1.75 cups – 1.75 cups + 2 tablespoons), room temperature, see notes above*
- 512 g (about 4 cups) bread flour, see notes above
- 3 tablespoons extra-virgin olive oil, divided, plus more for drizzling
- Nice, flaky sea salt, such as Maldon
Instructions
- Place the starter, salt, and water in a large bowl. Stir with a spatula to combine — it doesn’t have to be uniformly mixed. Add the flour. Mix again until the flour is completely incorporated.
- If time permits, perform one “fold”: 30 minutes after you mix the dough, reach into the bowl and pull the dough up and into the center. Turn the bowl quarter turns and continue this pulling 8 to 10 times. See video for guidance.
- Drizzle with a splash of olive oil and rub to coat. Cover bowl with a tea towel or bowl cover and set aside to rise at room temperature (70ºF/21ºC) for 4 to 18 hours (the time will vary depending on the time of year, the strength of your starter, and the temperature of your kitchen — in summer, for instance, my sourdoughs double in 6 hours; in winter, they double in 18 hours. Do not use an oven with the light on for the bulk fermentation — it will be too warm. It is best to rely on visual cues (doubling in volume) as opposed to time to determine when the bulk fermentation is done. A straight-sided vessel makes monitoring the bulk fermentation especially easy because it allows you to see when your dough has truly doubled.).
- When dough has doubled, place 2 tablespoons of olive oil into a 9×13-inch pan. (I have been using this USA Pan, which I love. I have had no sticking issues. If you are using a glass pan, you may, as a precaution, want to butter it it first — I have had disasters with bread sticking when I’ve used oil alone with other baking vessels.)
- Drizzle dough with a tablespoon of olive oil. Use your hand to gently deflate the dough and release it from the sides of the bowl. Gently scoop the dough into the center of the pool of oil in your prepared pan. Fold dough envelope style from top to bottom and side to side to create a rough rectangle. Turn dough over so seam-side is down. Video guidance here.
- Rub top of dough with oil. Leave alone for 4 to 6 hours, uncovered, or until puffy and nearly doubled.
- Heat oven to 425ºF. Rub hands lightly with oil, and using all ten fingers, press gently into the dough to dimple and stretch the dough to nearly fit the pan. Sprinkle generously with sea salt. Transfer pan to the oven and bake for about 25 minutes or until golden all around. Remove pan from oven and transfer bread to a cooling rack. Cool at least 20 minutes before slicing.
- Prep Time: 24 hours
- Cook Time: 25 minutes
- Category: Bread
- Method: Oven
- Cuisine: Italian
This post may contain affiliate links. Please read my disclosure policy.









1,777 Comments on “Simple Sourdough Focaccia: A Beginner’s Guide”
I don’t have a Dutch oven yet so I tried this as my first sourdough bake and wow! So yummy and your instructions and video are so easy to follow. I used 80g starter bc that’s all I had. It is dry and hot where I live so first rise happened in about 5 hours. I kept it in the fridge overnight then did the second rise this morning. It filled the pan in about 2.5 hours so I baked it then.
I will definitely be using your recipe once I get a Dutch oven
Great to hear, Cristina! I think focaccia is a great first bake for sourdough bakers. Thanks so much for writing and sharing your notes/experience.
Sooo….this recipe…*takes a breath* is AMAZING. I’ve made it like 10 times now. It has never failed. Makes excellent pizza. Makes excellent berry glazed/sweet focaccia. Makes great sandwich bread. And its soooo forgiving time wise, starter wise, temp…etc…etc… Thank you!
Great to hear, Sarah! Thanks so much for writing and sharing all of these notes. So nice to hear 🙂
Hello! Why is there diff measurements for sourdough starter and water ? Which one should I use ? Thanks
If you live in a humid environment, start with the smaller amount of water. And if it is very hot where you live, I’d also suggest the smaller amount of starter.
How do you adjust for an 8×8 pan? I’m so excited to try!
I would cut the recipe in half.
Would the oven temp and timing be the same?
Same oven temp, possibly slightly less time, but my guess if that is the case that it will only be by a minute or two. Definitely rely on the visual cues: evenly golden all around.
This recipe is so forgiving, I’ve made it twice now and I keep running out of time to get the second rise in, so I let it over proof just a little and do a second rise in the fridge overnight. My kids love it as pizza focaccia for lunch!
Great to hear, Anna! Thanks so much for writing and sharing your notes. Focaccia pizza for lunch sounds dreamy… lucky kids!
This recipe is my re-introduction to baking sourdough breads. I love its simplicity. Great recipe!
Great to hear 🙂 Thanks for writing and sharing this.
I’ve made this recipe quite a few times. It’s one of my favourite sourdough recipes. I use Tipo 00 flour with less water and a bit more starter. It makes the perfect springy soft bread every time. Thanks for the recipe!
Great to hear, Angie! Thanks so much for writing and sharing your notes 🙂
I’ve made this and it was….so good. I hate the frozen focaccia you get at restaurants and that was my only experience with the bread prior to making this. Now, it is my favorite bread of all the many types of bread I’ve made. It is also my new go to when gifting a meal to someone. Great recipe, very easy to follow 🙂
Great to hear, Heaven! Thanks so much for writing and sharing all of this 🙂
I love this recipe! I’m using a “nonstick” metal pan but for some reason it always sticks a tad and the bottom is a little more done than I would like. I’m not great at baking. Do you you have any suggestions for perfecting? I wish my bread was so fluffy and airy! Thank you!!!
HI! Great to hear 🙂
Are you buttering the pan before adding the olive oil? What rack are you baking it on?
Thank you for responding! I haven’t buttered the pan. Is that the key? I bake on the middle rack.
Yes, butter the pan before adding the oil — that will solve your sticking issues. You could try baking on the top rack to see if that helps with the over-browning on the bottom or you could set your pan on a sheet pan, which will provide a little more insulation for the bottom of the focaccia and will reduce browning.
Yes adding a pan at the bottom does help
Great recipe! Turned out great! Thank you!
Great to hear, Franklin! Thanks so much for writing 🙂
Wow! Made this today, and hubby said it’s the best focaccia bread I ever made! Thank you! I added minced garlic, onion powder, basil, and oregano.
Yum! Great to read all of this, Kareen. Thanks so much for writing and sharing your notes 🙂
Sensational! So easy & delicious, this will be on repeat. Thank you!
Great to hear, Avia! Thanks so much for writing 🙂
Thank you for this recipe! This was my first attempt at sourdough focaccia and it was a hit! I cold fermented overnight and baked about 4 hours after removing from the fridge. It lifted beautifully out of the pan thanks to your butter + olive oil tip on greasing the pan. Topped with fresh thyme, rosemary and Maldon sea salt. It was perfectly crispy on the outside and chewy with nice bubbles inside. Making another one today!
Wonderful to hear this, Sheila! Thanks so much for writing and sharing your notes/experience. Great to hear 🙂
Best Focaccia Recipe by far!
Great to hear, Becky! Thanks so much for writing 🙂
Hi! I love your other sourdough recipes and having been making for years. Excited to try this one tonight! Question— I love rosemary on my focaccia. Would you recommend adding schooling rosemary right before it goes into the oven (at the same time as the maldon salt)? If not, I’d love to know if you have another idea! Thanks!! 😊
Hi! I think it might just be a typo, but can you clarify what you mean by “schooling rosemary”?
Otherwise, yes, add the rosemary at the same time as the Maldon sea salt 🙂
Great recipe! My husband offered that it was the best focaccia he has ever had. The instructions are very detailed and easy to follow. And the bread itself is beautiful. Thanks!
Great to hear, Carol! Thanks so much for writing 🙂
Very simple and straightforward process with amazing results. I put black olives, rosemary and salt on the top – looked and tasted as if professionally prepared 😀. I now bake one every couple of weeks.
Yum! Love the sound of all of these additions. Thanks so much for writing and sharing 🙂
I’ve made this recipe before and I absolutely love it! In the past I make my dough in the evening, let it do its bulk fermentation overnight (that seems to work well in my kitchen) and put it in the pan in the morning, meaning I bake it around noon.
I’m about to make it again and trying to have it done cooking by 10am, so ideally I would like it to be in the pan overnight. Any advice on how to do this without over-fermenting the dough? Do I let it rise in the pan at room temp for 4-6 hours then I can put it in the fridge for up to 10 hours? Or should it just stay in the fridge to rise?
Thanks!
Hi Emily! Apologies for the delay here. Yes, after the 4-6 hour room temp rise, you can transfer the dough to the fridge — make sure it’s in an airtight container. It will need to proof at room temperature before baking however — ideally 2-4 hours.
So I love doubling the recupe for your overnight focacia recipe and letting it ferment and rise for 36-48 hours in the fridge then using it to make sicilian. My Question is could I do the same with this.recipe? If I use 200 g starter and double this recipe can I let it proof and rise in the fridge for 36-48 hrs?
Hi! Yes, you can double this recipe and use 200 grams. For sourdough, however, you need to proof at room temperature — fermentation of sourdough essentially stops in the fridge. So, you can bulk ferment at room temperature, once the dough increases in volume by 50-75%, you can proceed with the recipe or you can refrigerate until you are ready to proceed.
So far so good. I am at the in the 9 x 13 pan rise stage. But my timing is off. I need this bread for tomorrow morning for sandwiches. Can I refrigerate at this point for about 20 hours? Should I wait for the second rise in the pan and then refrigerate or put it in right now? It is hot here and my sourdough is nice and active – any advice or opinion appreciated.
I’m likely too late here. Ideally I refrigerate it immediately after I’ve transferred it to the pan. It will need to rise again at room temperature before baking — if it’s hot where you are, it might only need 2 hours at room temperature. In colder months, it can take as long as 4 hours.
If I want to make this recipe midday when do you suggest is the best time to start the first rise? Also can it be put into the refrigerator in between rises?
Hi! It really all depends on the strength of your starter and the temperature of your kitchen. But in general terms, if you want to bake it by midday, I would definitely suggest starting early in the morning.
Yes, you can refrigerate it after the bulk fermentation. You can also use the fridge as needed during the bulk fermentation if you need a pause (like to sleep :)).
Hi, can I use a half baking sheet for this?
Hi Rita! Yes, you can. Be sure it is buttered well before adding the oil. The focaccia will be on the thin side, but still delicious 🙂
If I choose to put the dough in the fridge after the initial rise how do I deflate it before placing in the fridge?
Hi Lexie! Apologies for the delay here. You’ll deflate it as shown in the video, then transfer it to a sealed vessel to protect it from drying out in the fridge.
If you refrigerate after the 1st rise, do you deflate it first?
Yes: ball it up, transfer it to an oiled storage vessel or the prepared buttered and oiled pan, then cover the pan tightly with plastic wrap or stick it in an airtight bag — you don’t want the dough drying out while it is in the fridge.
I love this recipe and have made it so many times – it always gets gobbled up! How can I adjust the temp/timing for a convection oven? My new oven is gas and it does not brown the top very well.
Great to hear! You could try baking at 400ºF convection for the entire time and seeing how the focaccia browns — if it’s not browned to your liking, crank it up to 450ºF at the very end and cook it for 5 minutes, keeping a close watch on it the entire time. It browns quickly at the end.
Thanks! After searching about convection temps, I tried it yesterday and it worked! It looks beautiful! I will now always bake it at 400 convection. Problem solved.
Wonderful! Thanks so much for reporting back 🙂
Despite fully following the recipe, my dough came out runny. The gluten did not develop st all, which i attribute to the lack of stretch and folds. If you’re going to find a focaccia recipe, I would recommend finding one that requires actually developing the gluten, not just letting the dough sit for hours on end.
Hi! Did you use a scale to measure? What type of flour, brand included, did you use?
I’ve made this recipe several times and it’s always a hit. I’d like to try making a Mexican street corn version adding charred corn kernes, jalapeños, and maybe some cheddar cheese. Would I add these before the first rise after mixing or work in during the dimple by phase?
Yum! Love this idea. It all depends on what you’re looking for: if you add them at the end, the inclusions will feel more like a topping; if you add them to the dough, they’ll feel more like part of the bread itself. I do worry that adding so many items at the start might slow down the bulk fermentation, so I’d suggest working them into the dough during the dimpling phase the first time you try this — it will look very pretty and will be so tasty. Depending on your results you could try adding them in after you’ve done one set of stretches and folds. You may need to add another set of stretches and folds to ensure everything is even’t incorporated.
Would you mind sharing your typical schedule when making this foccacia? Thank you!
Hi! It depends a bit on the strength of your starter and the temp of your kitchen/the time of year, but generally:
• Feed starter in the early morning.
• Six or so hours later, mix dough.
• Bulk ferment with one (maybe two) set of stretches and folds.
• Deflate dough, transfer to the fridge in an airtight container.
• The following day, remove the dough and transfer to buttered/oiled baking dish when I have time, meaning 4 hours or so before I plan on baking it.
• Proof until ready, then bake.
Made this today. Bulk ferment took 6 hours then I transferred the dough into my glass dish and stuffed it with shredded cheese, pepperoni, bacon bits, and onions, before making the envelope and flipping seam side down then layered the same on top. Popped it in the oven for an hour with the light on for the second rise. Smells delicious! Waiting for it to cool so I can enjoy. I also placed a cookie sheet under my dish so the bottom wouldn’t get too brown. Thanks for the easy recipe!
YUM! Love the sound of all of your inclusions. Thanks so much for writing and sharing your notes/method. Hope it was as delicious as it sounds 🙂
Love this easy to use recipe! I’ve made this several times already and have gotten better with it. Definitely butter the pan first so it doesn’t stick. I sprinkled with freshly chopped rosemary and sprinkled with salt and it was amazing! Thank you!!
Great to hear, Pearl! Thanks so much for writing 🙂
Hi! It’s the summer here about 85F outside. I used 50g starter and 440g water with bread flour and mixed at 11am. It’s now 4:30pm and has barely risen 1/2”. What am I doing wrong? I likely need more starter. How do I correct it?
Can I put this is the fridge for the initial rise?