 →
→ 

Overnight, Refrigerator Focaccia = The Best Focaccia Bread Recipe
 By Alexandra Stafford
—
Last Updated: 04/20/2026
By Alexandra Stafford
—
Last Updated: 04/20/2026
This post may contain affiliate links. Please read my disclosure policy.
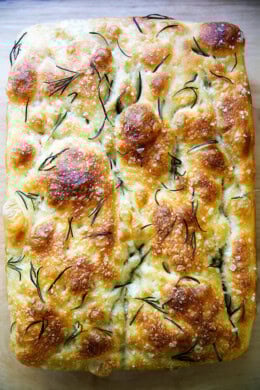
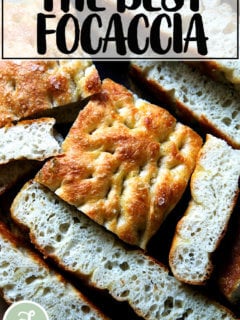
Cold, refrigerated dough is the secret to making delicious focaccia! Allowing the dough to rest 18 to 48 hours in the fridge will yield extra-pillowy and airy focaccia, though if you are pressed for time, you can make this start-to-finish in 3 hours. This 4-ingredient recipe requires only 5 minutes of hands-on time. Video guidance below!
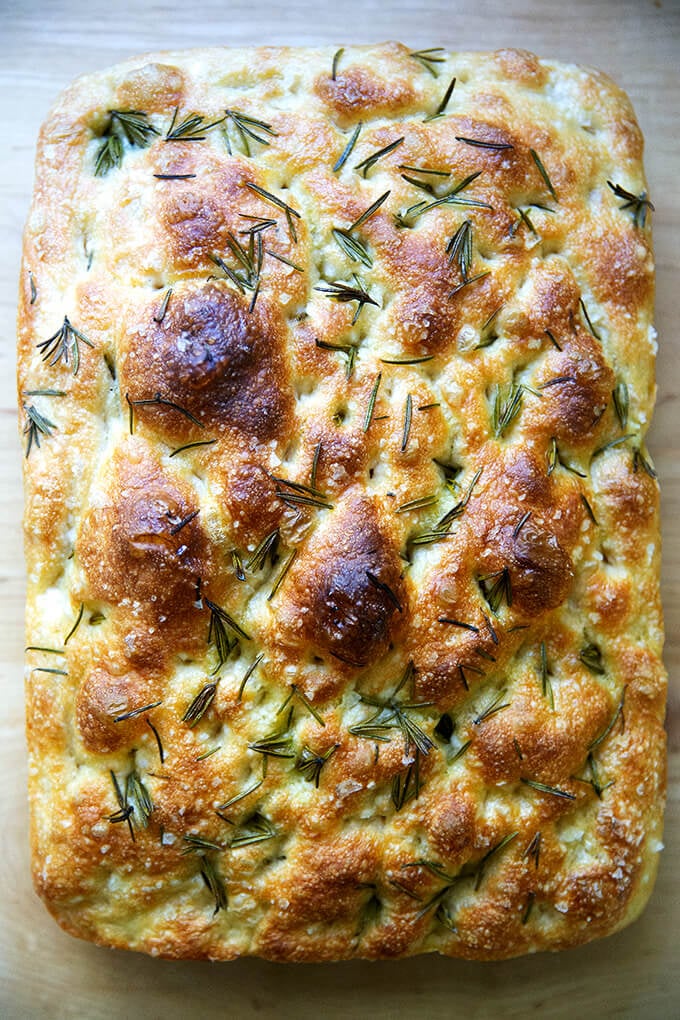
It’s hard to beat focaccia in the effort-to-reward category. If you are intimidated by bread baking, this is the recipe I suggest making first, both for its simplicity and flavor. Why?
- It’s a no-knead, 4-ingredient dough that takes 5 minutes to mix together.
- It requires no special equipment, no tricky shaping technique, and no scoring.
- If you have a 9×13-inch baking pan and your fingertips (for dimpling), you’re good to go.
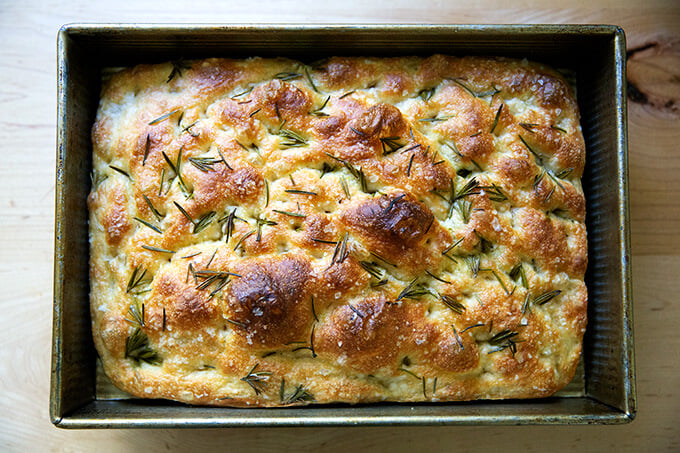
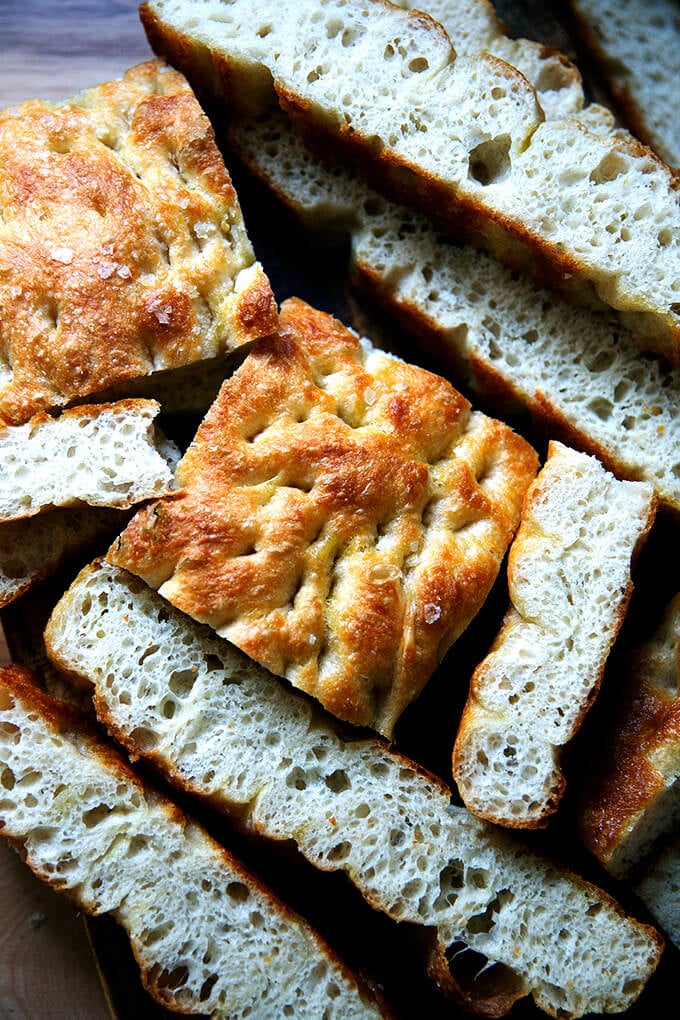
- It emerges soft and pillowy, olive oil-crusted, golden all around, and it’s completely irresistible.
Two Secrets for the Best Focaccia
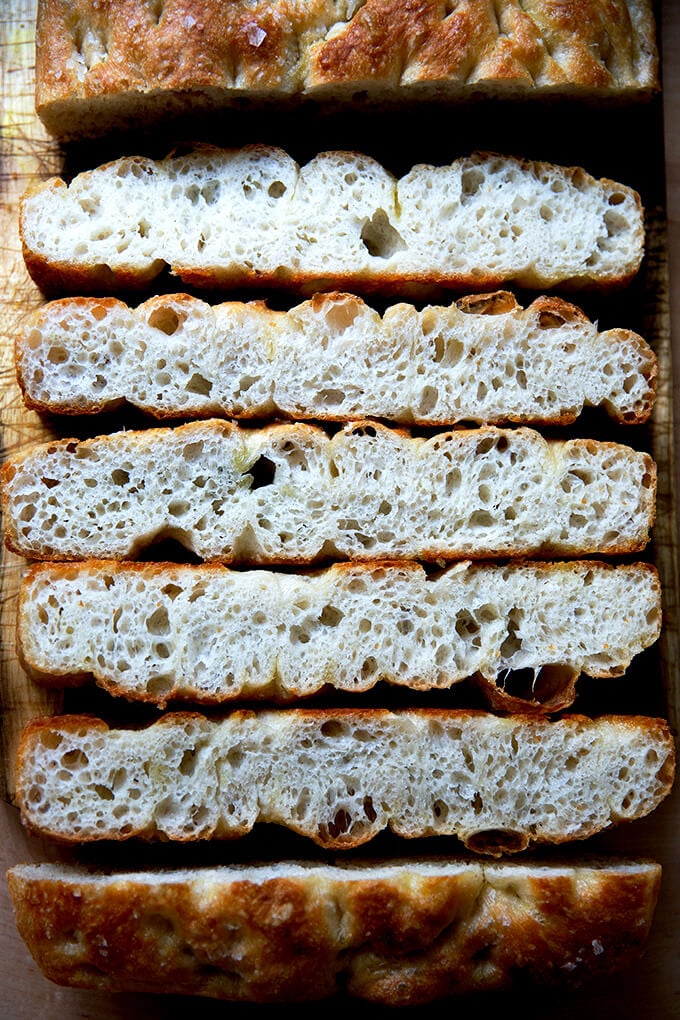
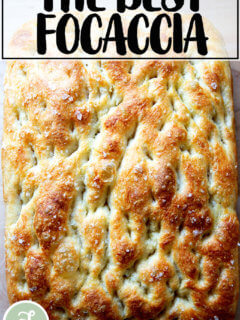
This focaccia emerges from the oven golden all around and pillowy inside, its surface dimpled with deep crevices, namely for two reasons:
- High hydration dough. This focaccia is 88% hydration.
- Long, cold, slow fermentation. This dough ferments in the fridge for at least 18 hours or for as long as three days.
Let’s explore each reason:
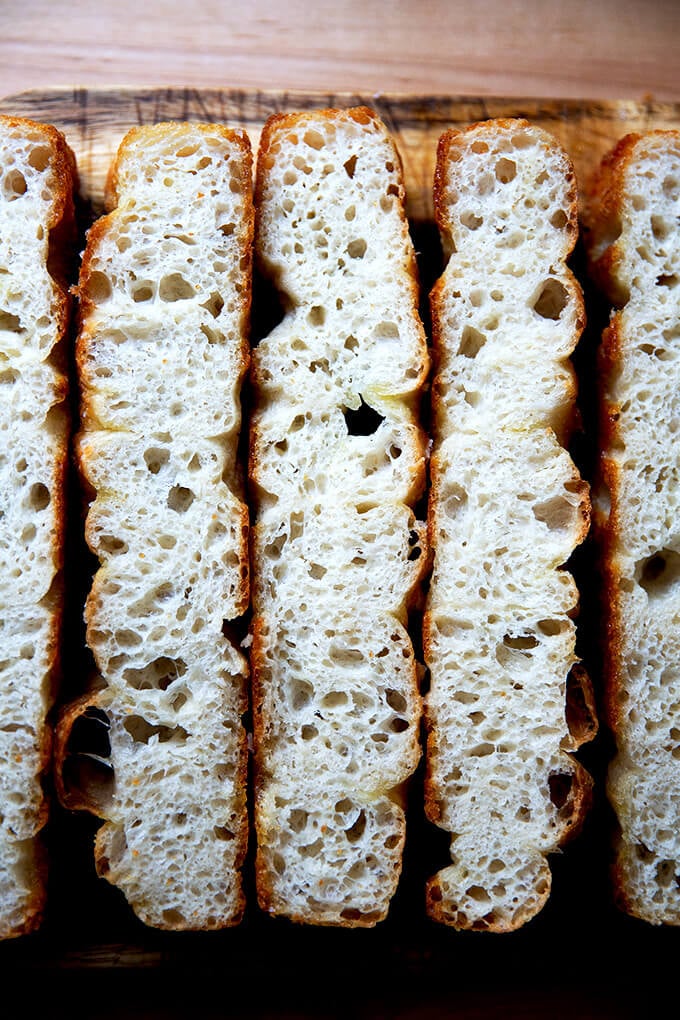
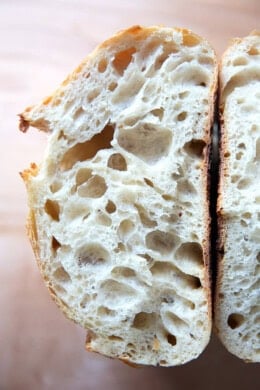
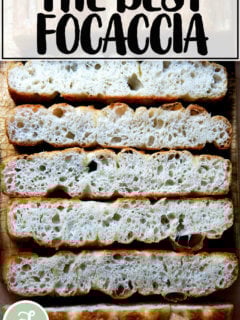
A high-hydration dough is a dough with a high proportion of water relative to the flour. A high proportion of water will create a light and airy dough and ultimately a focaccia with beautiful air pockets throughout. (Incidentally, this is the secret to making excellent pizza dough, too.)
A long, cold fermentation is beneficial to dough because during a slow fermentation allows enzymes in both the flour and the yeast to break down the starches in the flour into simple sugars. These sugars contribute both to flavor and to browning. Cool, right?
Furthermore, a long, slow fermentation strengthens gluten, which will further promote a crumb structure with lots of air pockets throughout.
How This Focaccia Recipe Differs from Others
There are lots of focaccia bread recipes out there, so why make this one?
- The long, cold refrigerator rise.
- The absence of sugar or honey or any sort of sweetener.
There isn’t any sweetener in this recipe because a sweetener simply is not needed — the yeast, contrary to popular belief, does not need sugar to activate or thrive. Sugar will speed things up, but when you’re employing a long, slow rise, speed is not the name of the game.
As noted above, during the long, cold fermentation, enzymes in both the flour and the yeast will break down the starches in the flour into simple sugars, which will contribute both to flavor and to browning, rendering sugar unnecessary.
PS: Once you master this simple focaccia, try your hand at this simple sourdough bread recipe, another recipe that requires minimal effort but yields spectacular results.
How to Make Focaccia Bread, Step by Step
Gather your ingredients: flour, water, salt, and instant yeast.
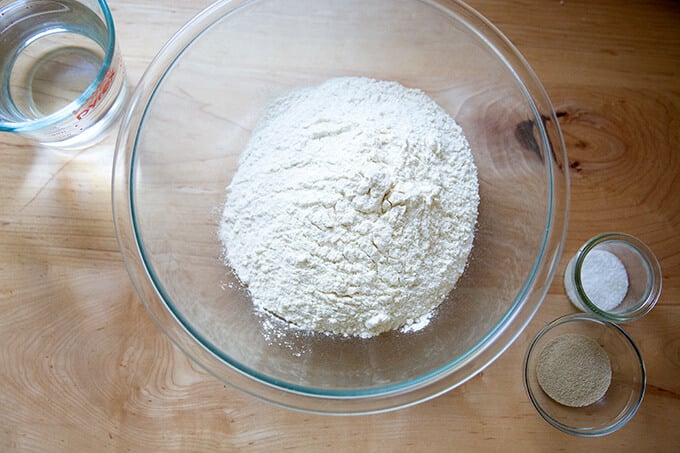
Whisk together the flour, salt, and yeast first:
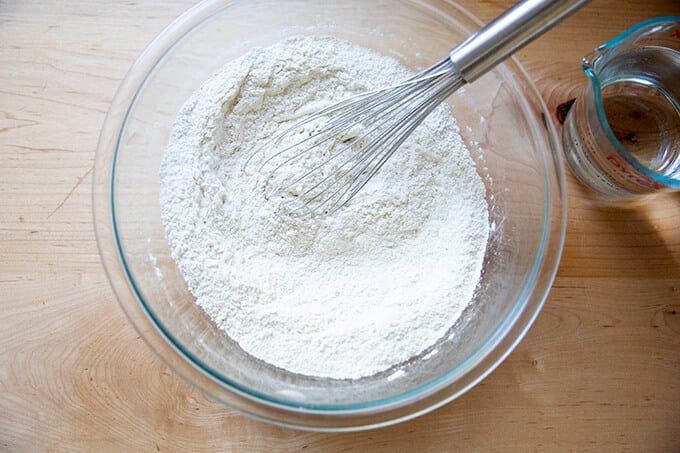
Add the water:
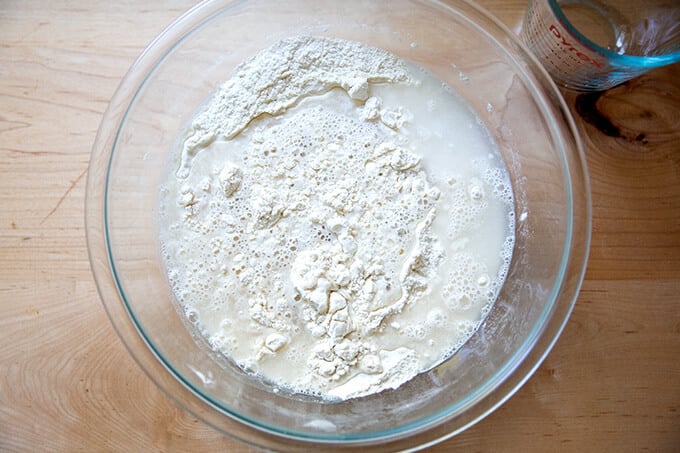
Use a spatula to stir the two together.
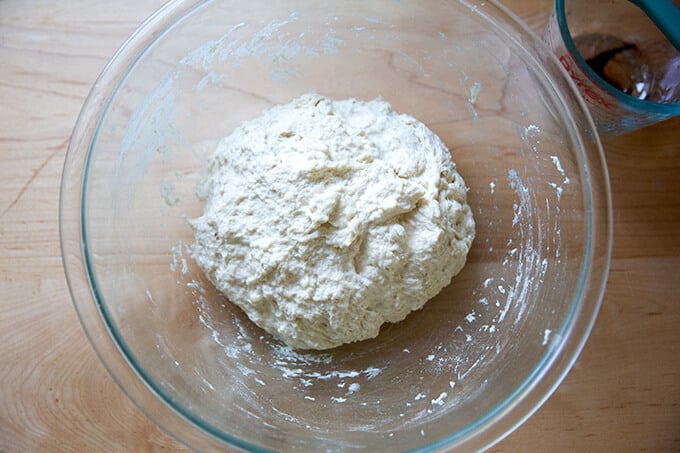
Slick the dough with olive oil…
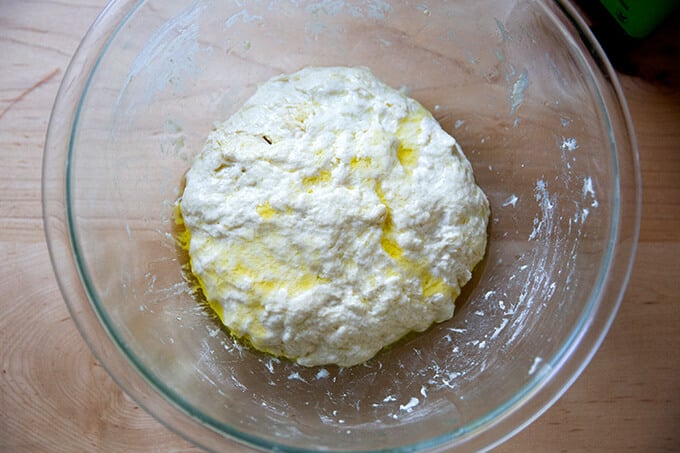
… then cover the bowl preferably with a lid. Stick the bowl in the fridge immediately; leave it there to rise for 12 to 18 hours (or for as long as three days).
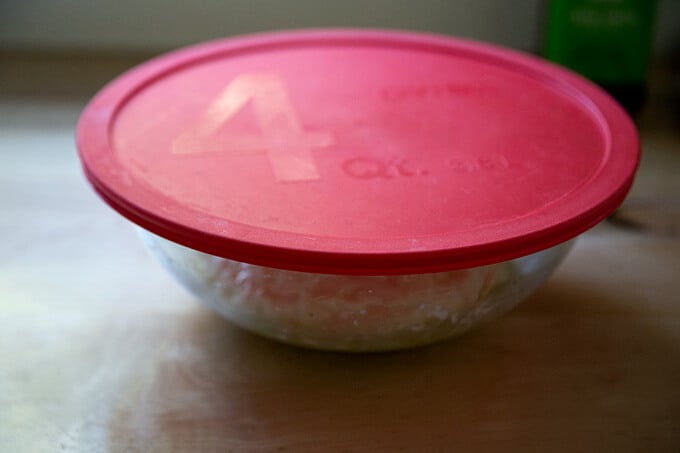
Remove from fridge, and remove the cover:
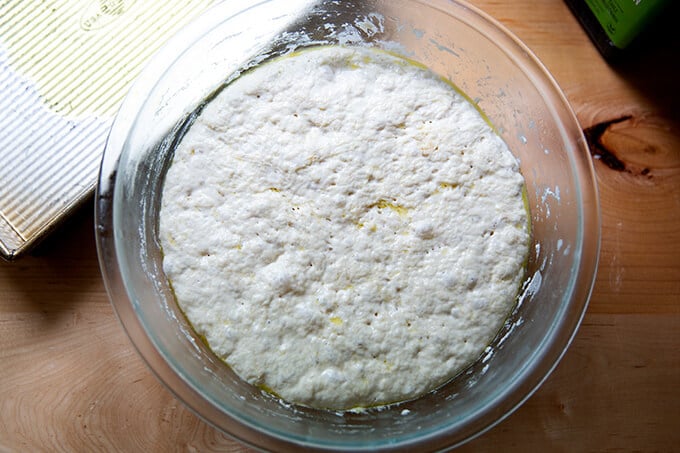
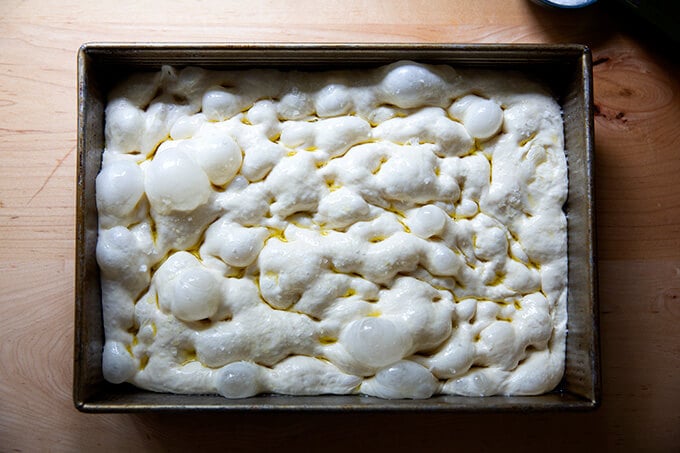
Deflate the dough, then transfer it to a buttered and oiled 9×13-inch pan. Don’t touch the dough again for 2 to 4 hours, depending on your environment.
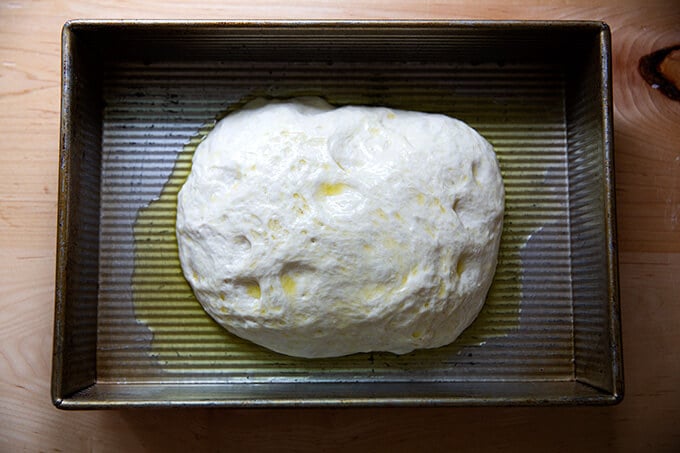
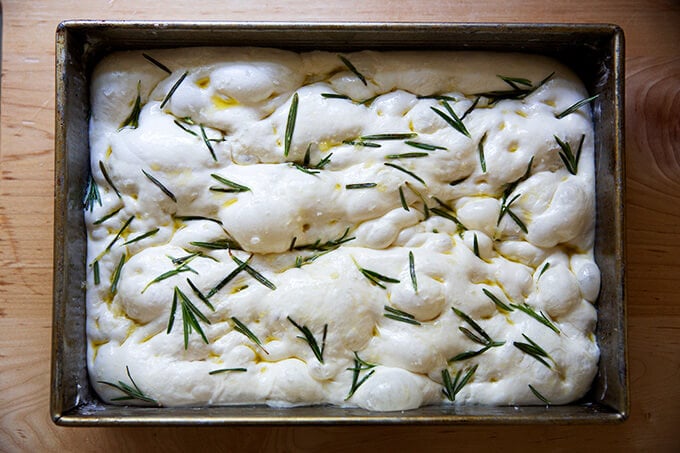
After two to four hours, or when the dough looks like this…:
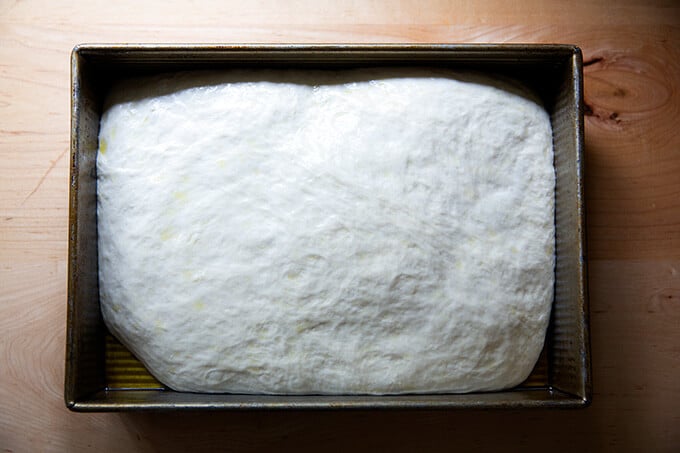
… it’s time to dimple it! You can simply use olive oil and salt — I recommend good, flaky sea salt for this. Note, the dough in the photo below spent three days in the fridge, and the dough was super bubbly!
if you are using rosemary, sprinkle it over the dough. Then pour two tablespoons of olive oil over the dough, and using your fingers, press straight down to create deep dimples. Sprinkle with flaky sea salt.
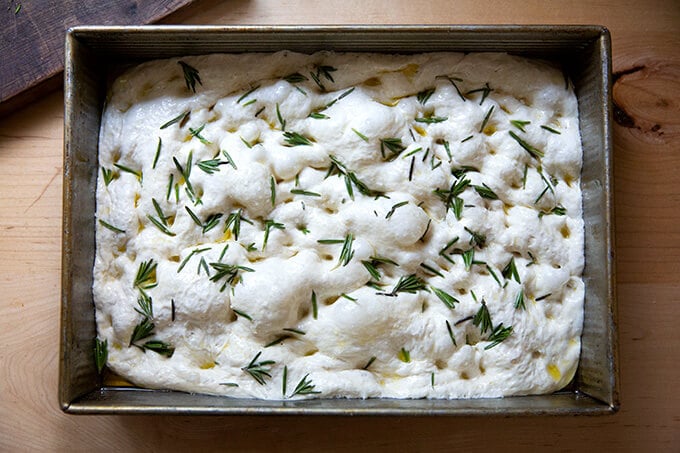
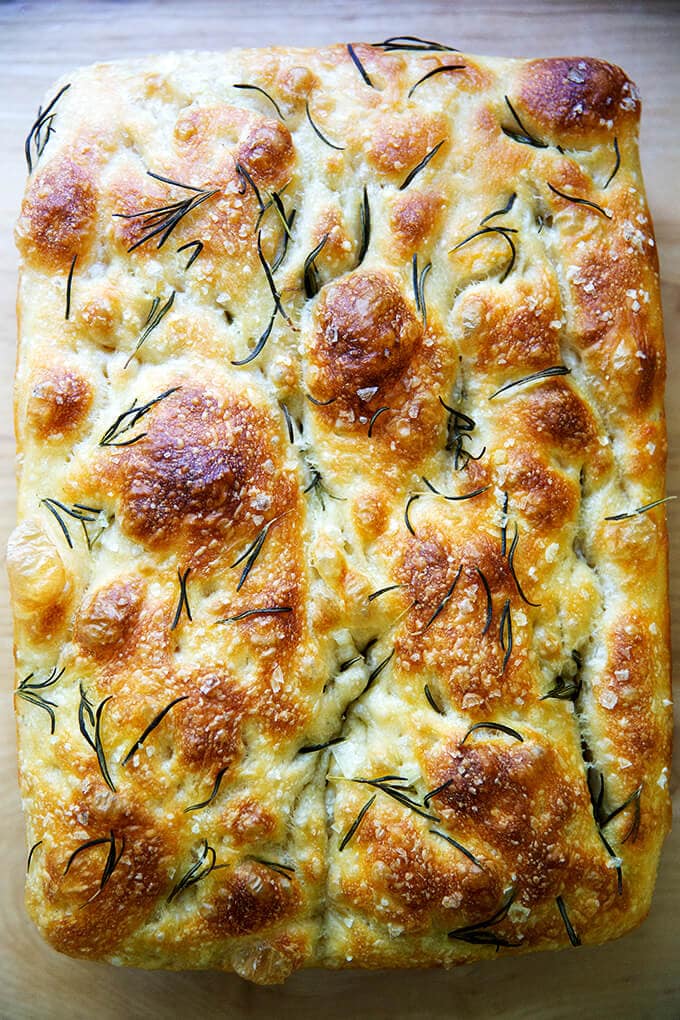
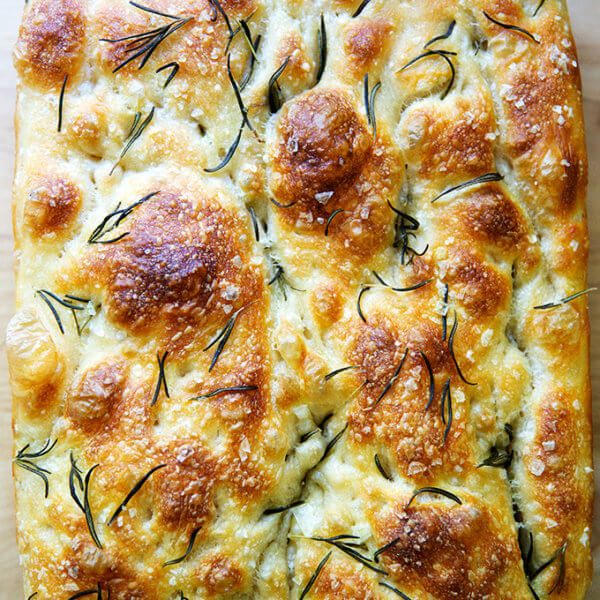
Transfer to the oven immediately and bake at 425ºF for 25 minutes or until golden all around. Remove focaccia from pans and place on cooling racks.

How to Incorporate Rosemary, Herbs, and Other Ingredients & Toppings into Your Focaccia Dough
- Add them on top as you would rosemary or other herbs. The key is to make sure the ingredients are slicked lightly with olive oil to ensure they do not burn in the oven. I like to sprinkle the rosemary over top of the dough, then drizzle it with olive oil, then dimple the dough.
- You can add them directly to the dough. In step one, when you whisk together the flour, salt, and instant yeast, add your ingredients — chopped olives, sun-dried tomatoes, roasted garlic — to the flour and toss to coat; then add the water.
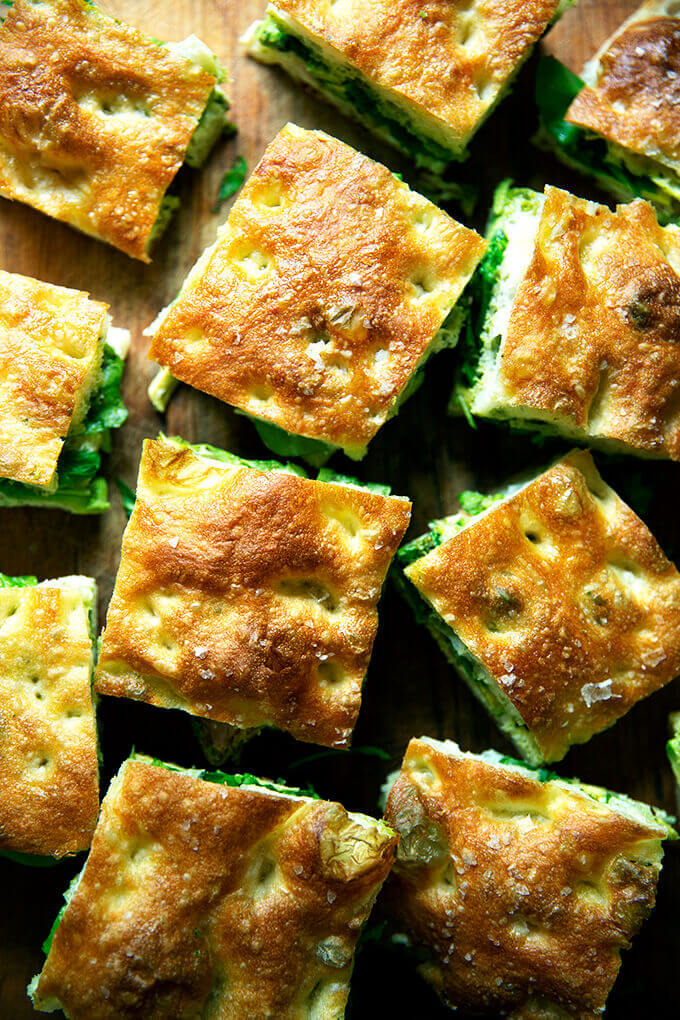
PS: How to Make Focaccia Slab Sandwiches
The Best, Easiest Focaccia Bread Recipe
- Total Time: 18 hours 30 minutes
- Yield: 2 loaves 1x
Description
Cold, refrigerated dough is the secret to making delicious focaccia! Allowing the dough to rest for a minimum of 18 to 24 hours (or up to 3 days) in the fridge will yield extra-pillowy and airy focaccia. However, if you are pressed for time, you can make this from start to finish in 3 hours. This 4-ingredient recipe requires only 5 minutes of hands-on time. Video guidance below!
Adapted from the focaccia recipe in Bread Toast Crumbs.
A few notes:
- Plan ahead: While you certainly could make this more quickly, it turns out especially well if you mix the dough the day before you plan on baking it. The second rise, too, takes 2 to 4 hours.
- If you are short on time and need to make the focaccia tonight: Let the mixed dough rise at room temperature until doubled, about 1.5 to 2 hours. Then proceed with the recipe, knowing the second rise will take about 30 – 60 minutes (or longer), depending on the time of the year.
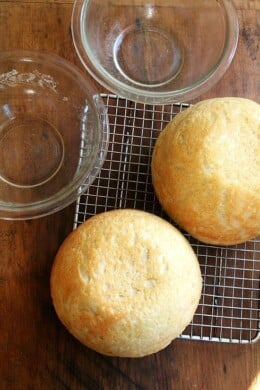
- You can use various pans to make this focaccia such as: two 9-inch Pyrex pie plates. (Use butter + oil to prevent sticking.) One 9×13-inch pan, such as this USA pan — do not split the dough in half, if you use this option, which will create a thicker focaccia . A 13×18-inch rimmed sheet pan — this creates a thinner focaccia, which is great for slab sandwiches.
- As always, for best results, use a digital scale to measure the flour and water.
- Salt: The rule of thumb with bread dough is that the weight of the salt should be 2 to 3% the weight of the flour. For this recipe, that is 10 to 15 grams. Do keep in mind that you sprinkle sea salt over the dough before baking, which adds to the saltiness. If you are sensitive to salt use 1o grams. If you are not, use 12 to 15 grams salt. I use Diamond Crystal kosher salt.
- I love SAF instant yeast. I buy it in bulk, transfer it to a quart storage container, and store it in my fridge for months. You can store it in the freezer also.
- If you are using active-dry yeast, simply sprinkle the yeast over the lukewarm water and let it stand for 15 minutes or until it gets foamy; then proceed with the recipe.
- Flour: You can use all-purpose or bread flour here with great results. If you live in a humid environment, I would suggest using bread flour. If you are in Canada or the UK, also consider using bread flour or consider holding back some of the water. Reference the video for how the texture of the bread should look; then add water back as needed.
Ingredients
- 4 cups (512 g) all-purpose flour or bread flour, see notes above
- 2 to 3 teaspoons (10 to 15 grams) kosher salt, see notes above
- 2 teaspoons (8 g) instant yeast, see notes above if using active dry
- 2 cups (455 g) lukewarm water, made by combining 1/2 cup boiling water with 1 1/2 cups cold water
- butter for greasing
- 4 tablespoons olive oil, divided
- flaky sea salt, such as Maldon
- 1 to 2 teaspoons whole rosemary leaves, optional
Instructions
- Make the dough: In a large bowl, whisk together the flour, salt, and instant yeast. Add the water. Using a rubber spatula, mix until the liquid is absorbed and the ingredients form a sticky dough ball. Cover the bowl, and let rest for 30 minutes, then stretch and fold the dough — this is an optional new step (9/17/2025), but if time permits, do it: I find it makes for an especially bubbly focaccia. Fill a small bowl with water. Using a wet hand, grab an edge of the dough and pull it up and towards the center. Repeat this stretching and folding process, 8 to 10 times, moving your hand around the edge of the dough with every set of stretches and folds. As you stretch and fold, you should feel the dough transform from being sticky and shaggy to smooth and cohesive. Find video guidance here.
- Cold proof: Rub the surface of the dough lightly with olive oil. Cover the bowl with a lid (ideally) or plastic wrap and place in the refrigerator immediately for at least 12 hours or for as long as three days. (See notes above if you need to skip the overnight rise for time purposes.) NOTE: It is important the dough really be slicked with olive oil, especially if you are not using a hard lid. If you do not slick the dough with enough oil, you risk the dough drying out and forming a crust over the top layer.
- Line two 8- or 9-inch pie plates or a 9×13-inch pan (see notes above) with parchment paper or grease with butter or coat with nonstick cooking spray. (Note: This greasing step may seem excessive, but with some pans, it is imperative to do so to prevent sticking. With my USA pans, I can get away with olive oil alone; with my glass baking dishes, butter is a must.)
- Pour a tablespoon of oil into the center of each pan or 2 tablespoons of oil if using the 9×13-inch pan. Using two forks, deflate the dough by releasing it from the sides of the bowl and pulling it toward the center. Rotate the bowl in quarter turns as you deflate, turning the mass into a rough ball. Use the forks to split the dough into two equal pieces (or do not split if using the 9×13-inch pan). Place one piece into one of the prepared pans. Roll the dough ball in the oil to coat it all over, forming a rough ball. Repeat with the remaining piece. Let the dough balls rest for 3 to 4 hours depending on the temperature of your kitchen (Note: no need to cover for this room temperature rise).
- Set a rack in the middle of the oven and preheat it to 425°F. If using the rosemary, sprinkle it over the dough. Pour a tablespoon of oil over each round of dough (or two tablespoons if using a 9×13-inch pan). Rub your hands lightly in the oil to coat, then, using all of your fingers, press straight down to create deep dimples. If necessary, gently stretch the dough as you dimple to allow the dough to fill the pan. Sprinkle with flaky sea salt all over.
- Transfer the pans or pan to the oven and bake for 25 to 30 minutes, until the underside is golden and crisp. Remove the pans or pan from the oven and transfer the focaccia to a cooling rack. Let it cool for 10 minutes before cutting and serving; let it cool completely if you are halving it with the intention of making a sandwich.
- To store the focaccia: When it has completely cooled, transfer it to an airtight bag or vessel and store it at room temperature for up to 3 days. Otherwise, freeze it for up to 3 months. Always reheat it on subsequent days to revive its crust: 350ºF for 15 minutes.
Notes
To Make Muffin Tin Focaccia:
- Make the focaccia through step 3.
- Butter a muffin tin + 2 small ramekins or a crème brulée dish.
- Drizzle oil into each muffin well.
- Deflate the dough, then use two forks to portion it into small pieces, dropping the pieces into each well — each well will be 3/4 to nearly full. Drizzle with more oil. Turn each piece to coat in the oil.
- Let the dough rise again until it puffs above the rim, 30-45 minutes. Drizzle with more oil, then dimple. Sprinkle with sea salt and fresh rosemary.
- Bake at 425ºF for roughly 20-25 minutes. If necessary, brush with more oil out of the oven.
- Prep Time: 18 hours
- Cook Time: 30 minutes
- Category: Bread
- Method: Oven
- Cuisine: Italian
This post may contain affiliate links. Please read my disclosure policy.






7,340 Comments on “Overnight, Refrigerator Focaccia = The Best Focaccia Bread Recipe”
I can’t wait to try this recipe for a church potluck this Sunday. I was wondering if I mix up tonight and bake tomorrow night will it taste fresh and good the next day (Sunday)? What is the best way to store overnight?
Hi! Are you able to re-heat it before baking it? I do think it is best freshly baked or reheated — it reheats beautifully. Otherwise, if it’s only stored overnight in an airtight bag (I use a 2-gallon ziptop bag) that will be fine!
I have made this recipe 4 times. It’s the easiest and best foccacia we’ve ever eaten…and friends rave about it when I share! So far I’ve only done it with rosemary, both in the dough and on top and next I’ll try the cinnamon sugar one.
This is an easy beginner dough and bread for all levels of bakers…give it a go!
Great to hear, Gail! Thanks so much for writing and sharing this.
Amazing recipe. My family loves this focaccia bread. Thank you so much for sharing! ❤️
Great to hear, Donna! Thanks so much for writing and sharing 🙂
This was my first time making bread and the recipe was really easy to follow! The focaccia turned out absolutely delicious, it might be the best thing I’ve ever tasted 😀 Will be making this many more times!
Great to hear, Marion! Thanks so much for writing and sharing this 🙂
Amazing and so easy. Thank you so much for this recipe.
Great to hear, Ilana 🙂 Thanks for writing.
Great recipe, I add basil, salt, garlic, onion, and sun-dried tomatoes. If you use fresh basil put it on after you pull it from oven while it’s still hot or it will burn. This is why I put dried basil in the dough as well. Along with garlic powder/salt. Then fresh garlic onion and sun-dried tomatoes on top.
I had to use wine yeast, which isn’t ideal. It still turned out great tho! I would imagine a bread yeast would have improved the flavor even more. I’m dying to make this dough without the stuff on top and use it as pizza dough. So I’ll see .
Great to read all of this 🙂 Thanks so much for writing and sharing your notes. All sounds super yummy.
Hi,thanks for the grat recipe, i have a question, if i want to cut the dough in half for two pans,when should i do it? And should i stretch and fold the halfs again to make them round or not?
You can divide it after the first rise — so, just before you transfer each half to each pan. Once you plop each portion into the buttered and oiled pan, you can gently shape each into a rough ball with your hands — doesn’t have to be perfect.
So I used active dry yeast instead of instant. the active dry yeast comes in 1/4 ounces packets and i have to mix with 1/4 cup of warm water per your instructions. However, how MUCH of it do i need to use if your recipe requires 8 grams of instant yeast?
Hi! Those 1/4 ounce packets are roughly 2.25 teaspoons. I typically use 2 teaspoons of instant yeast because I buy it in bulk — feel free to use the whole packet of ADY for ease. It will come out the same. For this recipe, simply sprinkle the ADY over the lukewarm water (all of it); then proceed with the recipe.
Hi! Wondering if this can be made in a cast iron or carbon steel for a crispier bottom?
Absolutely! Be sure to butter it before putting in the olive oil as directed.
This is my go-to focaccia recipe! I’ve made it both savory (sprinkled with rosemary + flake salt) and sweet (cinnamon-roll style with a brown sugar cinnamon layer/topping + icing) – it’s a hit every time! The trickiest part is planning out the timing, the recipe itself is simple and easy to execute. 100% recommend giving it a try!
Great to hear, Tara! Thanks so much for writing and sharing your notes — very encouraging for others 🙂
Such an easy to follow recipe and turns out delicious every time! We started letting it proof with the rosemary mixed into the dough and it turns out even more flavorful!
Yum! Love this idea. Thanks so much for writing and sharing this.
I love this recipe! I use it all the time and have shared it with others. The BEST!
Great to hear, Becca! Thanks so much for writing 🙂
This focaccia turned out amazing — light and airy with tons of air pockets! I didn’t have much of anything to put on top, but some everything bagel seasoning and a little parmesan did the trick. I definitely won’t be using any other recipes in the future.
Great to hear, Ashley! Thanks so much for writing and sharing this 🙂
I’ve made this so far twice!! Both times work out amazing, I do stretch and folds twice, once after the dough sits for 30 minutes, and the second time right before it proofs at room temperature for a few hours and have always gotten an amazing airy consistency making it super duper fluffy!! Absolutely amazing recipe!!!
Great to hear, Makenzie! Thanks so much for writing and sharing your notes/process.
This is my GO TO recipe! Whenever i have guests over i look for and make two different types of foccacia. With garlic or rosemary or basil and tomatoes… now I’m making it with basil, rosemary and chives from my garden. I’m always making the quick and pressed for time version and it’s been wonderful every time! Thanks so much!! ☀️
Great to hear, Chanel! Thanks so much for writing and sharing all of these notes. So glad the quick version works so well for you.
I absolutely love this recipe! It’s extremely easy, and forgiving.
I’ve let it sit for 3 days, I’ve forgotten the stretch and pulls. Heck, I’m not even sure I measured properly once or twice!
But each and every time, this recipe comes out perfect!
I’ve added different inclusions each time I make it. From olives, to cranberries. Rosemary, garlic, Parmesan cheese. And even made cinnamon bread with it!
I have 2 bowls in the fridge tonight, and tomorrow I’ll be making 4 different flavors. Rosemary, Italian herb and Parmesan, cheddar jalapeno and rosemary, basil and parmesan.
So nice to read all of this, Lori! Thanks so much for writing and sharing all of your notes. Love the sound of all of your inclusions.
OH YEAH!! I’m 87 years old and have never had Focaccia bread before. This is definitely worth living another 13 years for. Krispy Krust, soft interior and so tasty. I just had it fresh from the oven alongside of a bowl of caponata. I can’t think of it more Heavenly meal. Thank you for the recipe I’ll be making this often.
YES Gerard!! Love reading this. Focaccia will fuel the next 13 years and beyond 💪💪💪 Caponata is one of my favorites. Focaccia + caponata sounds dreamy, a perfect dinner as far as I’m concerned.
I started the process yesterday morning and was done by 2:00 today for Italian sandwiches with prosciutto, fresh mozzarella, tomatoes and pepperoni. I skipped the rosemary and instead dropped dollops of basil pesto before baking. It was amazing and so easy! Definitely a keeper.
Basil pesto sounds delicious
Yum! Love the sound of all of this. Thanks so much for taking the time to write and share 🙂
I want to make the sourdough version of this. My starter is ready. Should I follow your sourdough focaccia dough recipe, but also this one for the long, refrigerated cold proof?
Yes! After the bulk fermentation, transfer the dough to a sealed vessel and transfer it to the fridge. Then proceed when you are ready.
I’ve just mixed all ingredients together, covered in cling wrap and left at room temperature. I’m pressed for time so do I just fold in 1.5 hours and then cover at room temperature and let it sit for 2 hours? Sorry first time making focaccia
Hi! Do one set of stretch and folds 30 minutes after you mix the dough, then let it rise for 2 hours at room temperature.
The bread turned out awesome…recipe was super. I refrigerated tge dough for about 15 hours or so…
Great to hear! Thanks for writing 🙂
This was out of this world!!
Great to hear, Libby!
Omg thank you! I wanted focaccia and didn’t want to go to the store. I love to cook savory but I had never baked any bread other than banana.. this recipe was so spot on! The first time I made it I let the dough be in the fridge for about 24 hours. I added some herbs in the dough and some on top. I did use the 9 x 13 sheet pan. It turned out wonderfully! The next time I did the quick method. It was ok but day 2 it was a bit tough. I’m on my third try (i just started this 2 weeks ago-haha). I’m gonna let it go 48 hrs and use the 9×13. Everyone loves it!!
Great to read all of this, Raquel! Thanks so much for writing and sharing your notes/experience. Hope your 48-hour experiment is a success 🙂
It starts off very wet, but so delicious
I’m a simple home cook who enjoys making foods for my husband and kids because that’s just one way I express my love for them. I’m also the kind of person who looks for the best recipe for anything I prepare, because I like to give them the best. I like to try new recipes for a dish or baked good and if I don’t like the way it turns it, then I tweak the recipe or I move on to another one that produces a better result. I don’t settle.
Well, this is my first time making savory bread and I did a lot of research because there are so, so many focaccia recipes out there. I don’t like to waste ingredients and time is precious, so I try my best to pick a good recipe the first time I make something new. I chose this recipe for the simplicity and good reviews.
It did not disappoint. I read the recipe thoroughly and I appreciated the notes! I’m usually terrible at salting to taste but I followed the salting notes and it came out perfectly seasoned and balanced. This recipe yields such a beautiful and delicious bread! My husband was the first to taste it and he didn’t say anything. He simply smiled and nodded. Then he gave me a fist bump and a thumbs up as he cut off more to eat. Thank you for sharing this. It’s going in my recipe box for sure!
Aww, Catalina! I love reading all of this. Thanks so much for taking the time to share your notes and approach to cooking/baking. I love that your husband gave you a fist bump… the sweetest. Happy baking 🙂
Hello,
I love this recipe, I’ve made it numerous times! However this time I had an oops, I somehow forgot about the overnight rise and am making it today. I read that you can do it without the dough going in the fridge for the longer rise. My question is, will it still be as light and airy or will it be denser and less flavorful?
Thanks!
Hi! Apologies for the delay here. Many people prefer it with the shorter rise, so don’t hesitate to make the quick version. I personally prefer the longer, cold rise, but again, both methods work.
Absolutely delicious! It came out so fluffy and yummy. Only one problem, it was so good it disappeared in less than10 minutes 😜
Success! This makes me happy 🙂 Thanks so much for taking the time to write and share this.
LOVE! For some reason everytime i make it, it doesnt grow and spread on the pan, it just stays like in a round shape. Any idea as to why? Great recipe xx
Interesting! What type of flour (brand included) are you using? Are you using a scale to measure? And how long are you leaving it at room temperature before you are trying to dimple/spread it out. Finally, is it cold where you are?
Hi Alexandra, I did last week and was spectacular. I am doing now one for tomorrow.
Thank you
Great to hear, Mario! Thanks so much for writing 🙂
By far the BEST receipe iv followed!
Iv tried alot of foccacia and this one worked the best. It was very sticky, but rose like crazy because its super hot at the moment !
I did the short version, but will try the longer fridge one!
Now my go to recipe.
Thank you !
Great to hear, Suzy! Thanks so much for writing and sharing your notes/experience. Hope the longer version is a success, too 🙂