 →
→ No-Knead Overnight Sandwich Rolls
This post may contain affiliate links. Please read my disclosure policy.
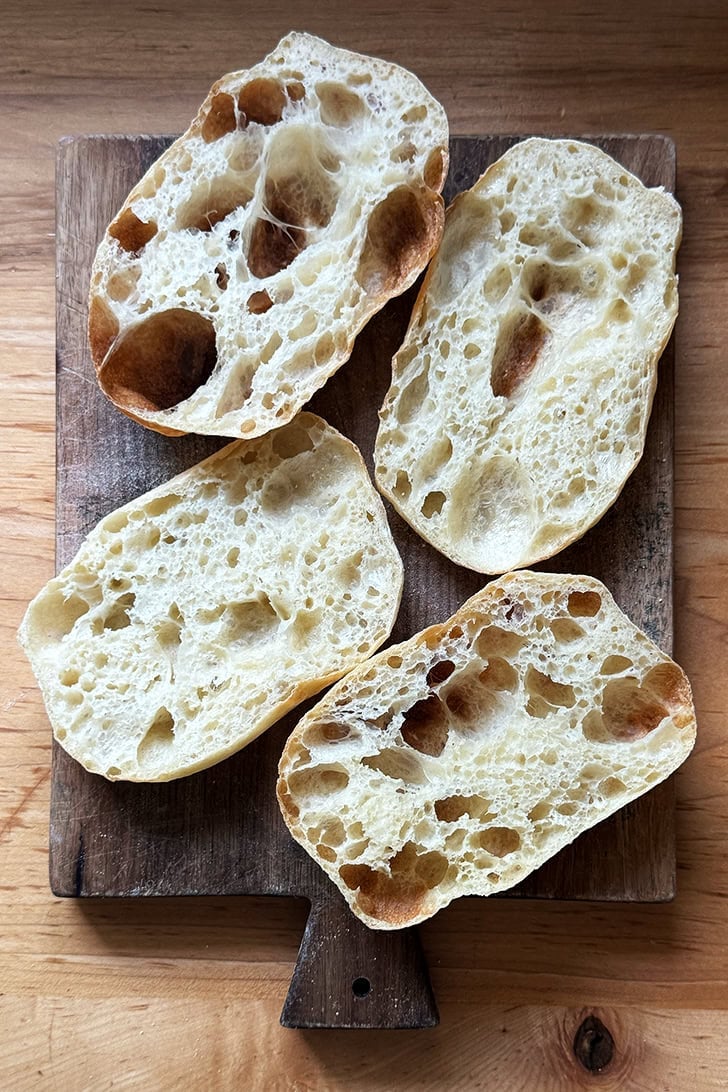
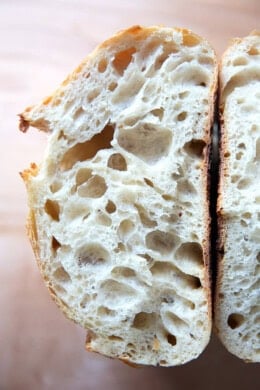
This 4-ingredient dough takes five minutes to mix together, and from there, time does the work. After an overnight rise, the dough is ready to be portioned, balled up, and baked. Crusty with a light and airy crumb, these rolls are perfect for sandwiches!
Do you have access to a great bakery? Where you can buy freshly baked baguettes and light and airy ciabatta rolls? You do? I’m jealous.
When I crave a crusty roll to house sandwich fillings, I make my own. In short, I use the peasant bread recipe — but I give it the Lahey treatment: I cut the yeast way back, use cold water, and extend the rise to overnight (or about 12 hours).
Here’s a thought: set aside 5 minutes to mix this dough together this evening. Tomorrow, when you are rewarded with a delicious vessel to sandwich anything your heart desires, or perhaps balsamic-roasted eggplant and arugula, you will thank yourself. Effortless and delicious. You’re welcome.

How to Make No-Knead Overnight Sandwich Rolls, Step by Step
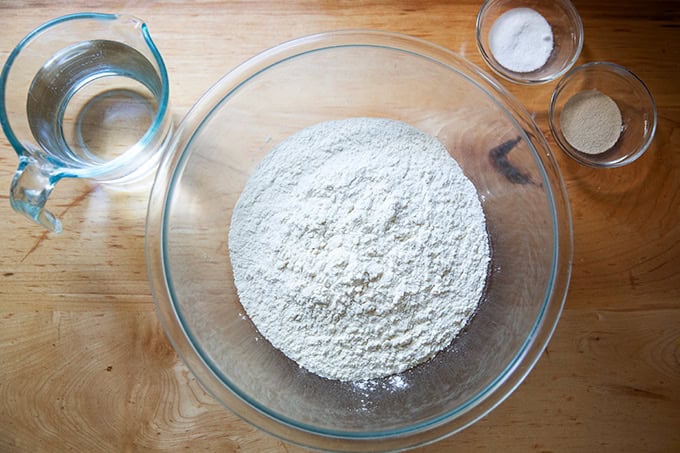
First, gather your ingredients:
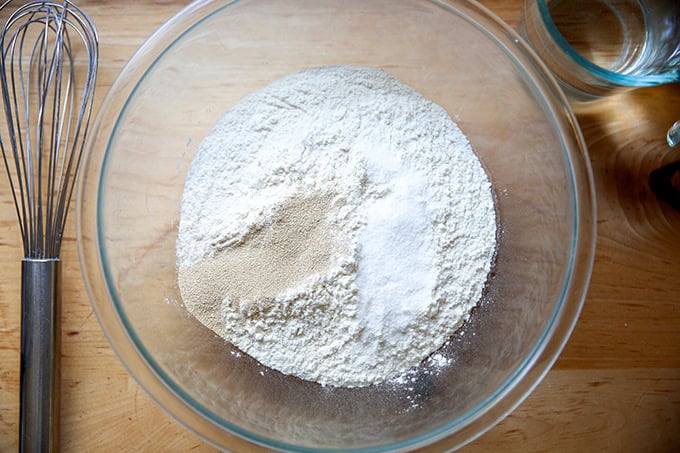
Whisk together the flour, salt, and instant yeast, then…
…add the water:
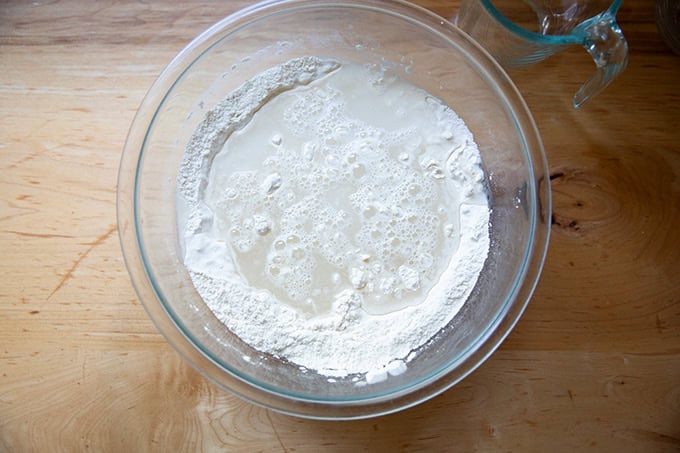
And stir with a spatula until you have a sticky dough ball:
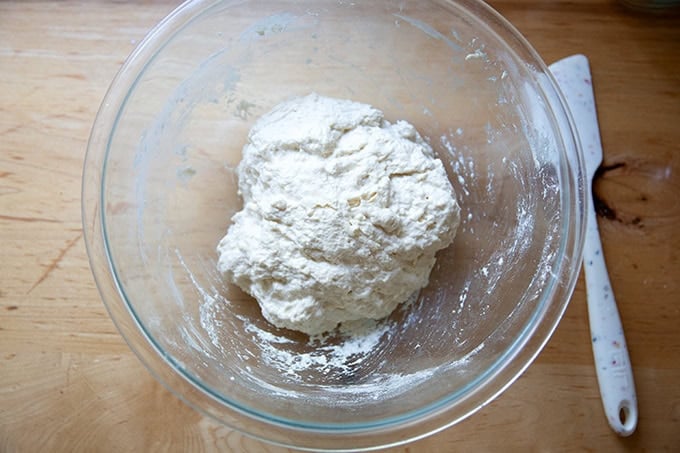
Cover the bowl and let it rest for 30 minutes, then stretch and fold it. Video guidance here.
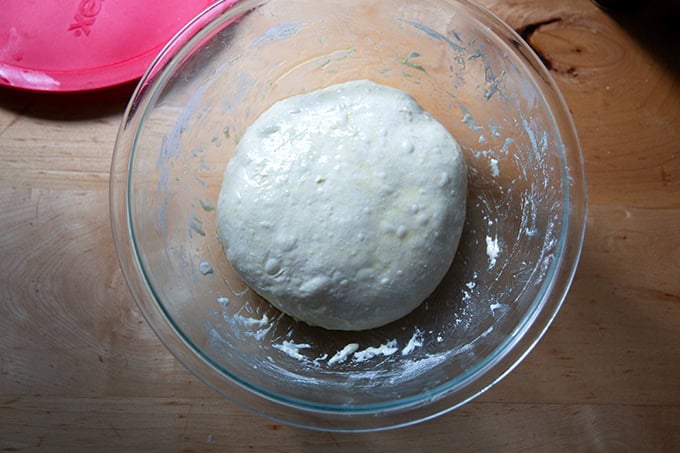
Cover the bowl, let it rise at room temperature for roughly 12 hours or until it looks like this:

Turn the dough out onto a well-floured surface:
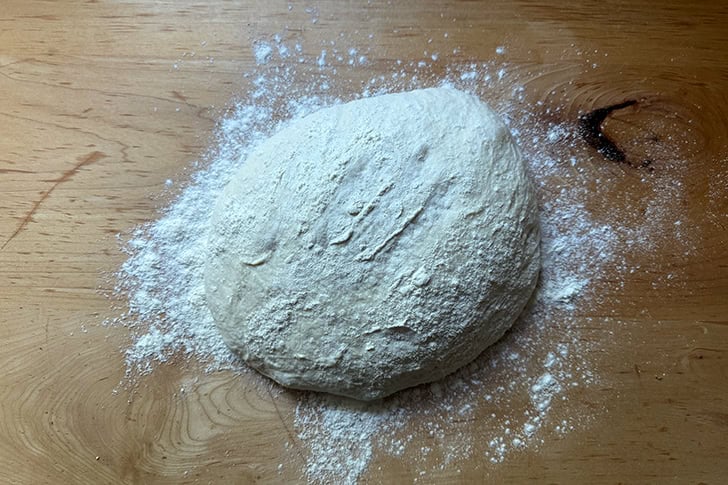
Then portion it out:
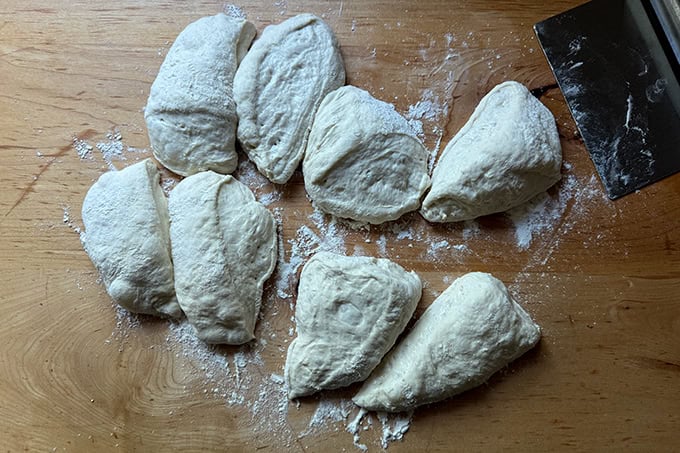
I like to use a scale to portion, which ensures each roll is roughly the same weight and which in turn will ensure the rolls will bake evenly:
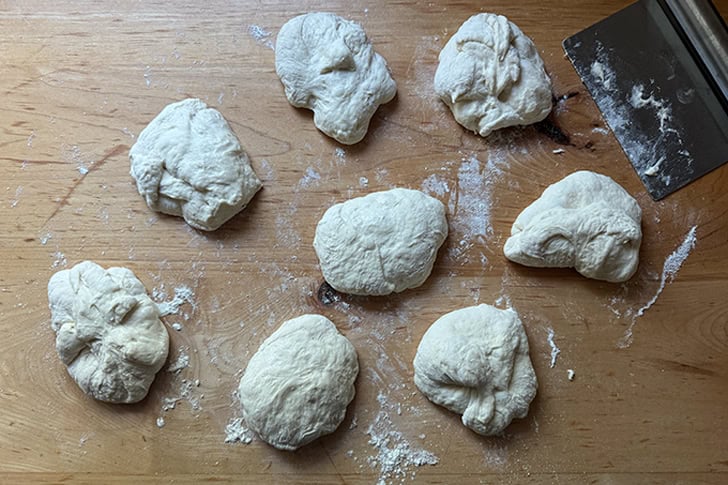
Shape the portions into rough balls:
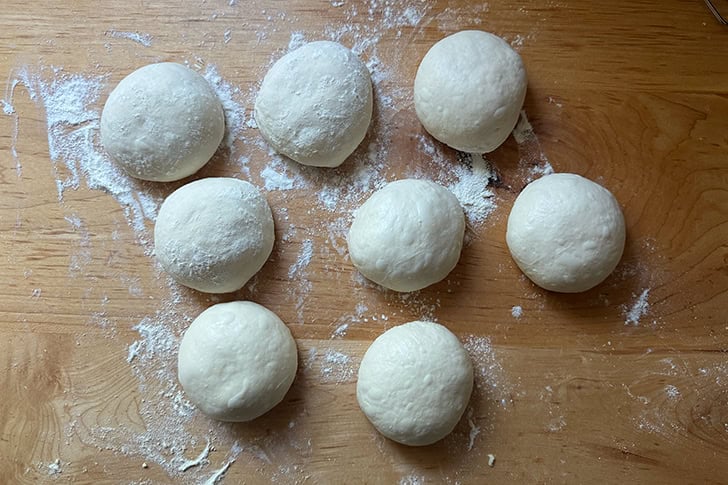
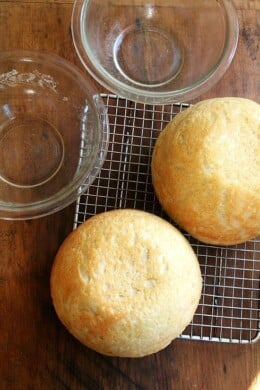
Then transfer them to a floured vessel, ideally something like a lidded DoughMate, to rise. I use two of these DoughMates. Alternatively you could use two 9×13-inch vessels, which you can cover with a sheet pan or plastic wrap.
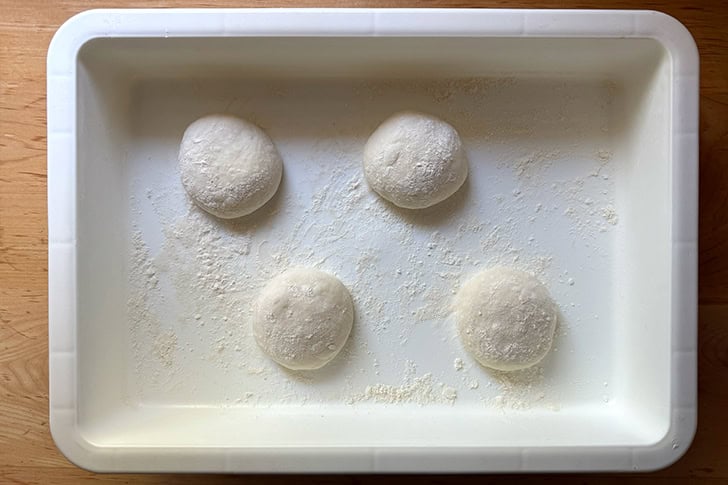
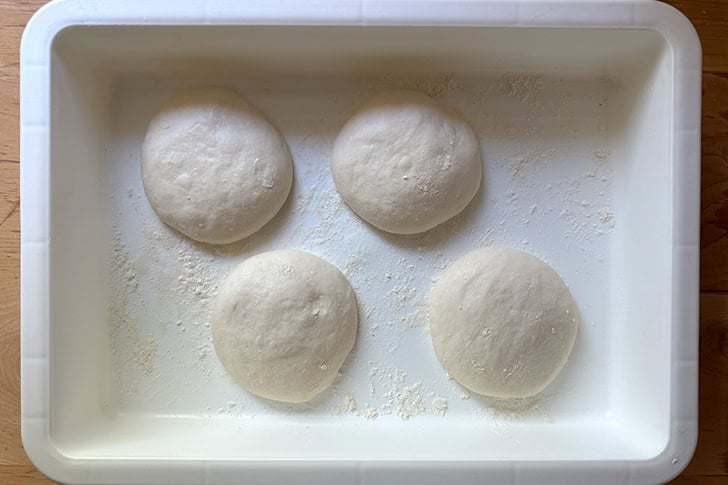
Let the dough balls proof at room temperature until they feel light to the touch, at least 2 hours:
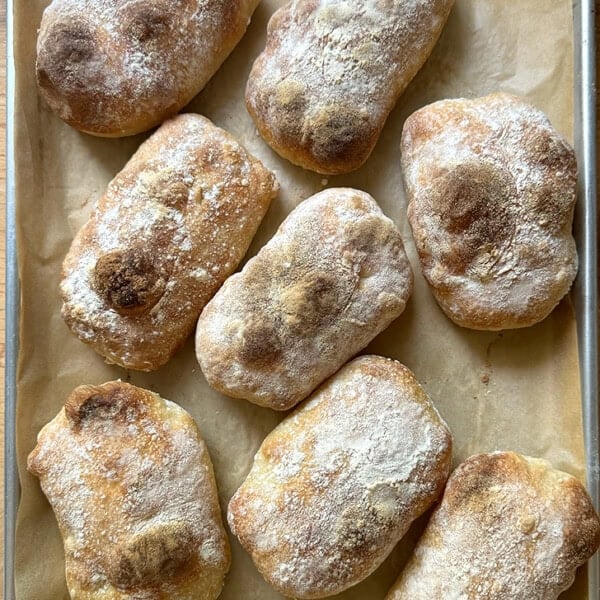
Using floured hands, carefully transfer the balls to a parchment-lined sheet pan:
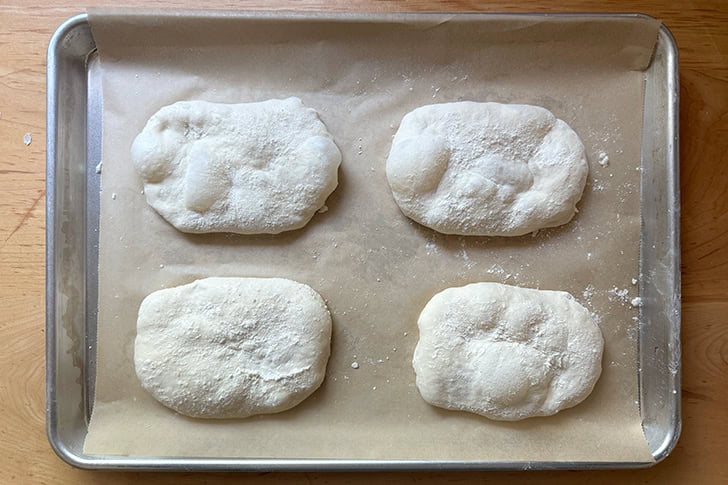
Then bake for 15 minutes @ 475ºF:
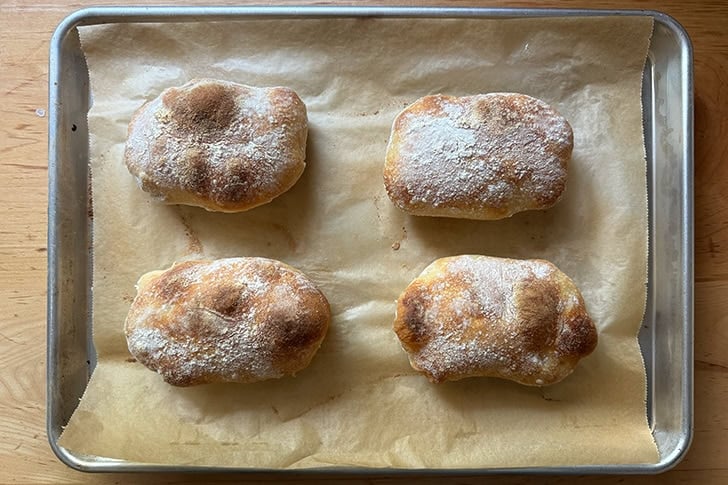
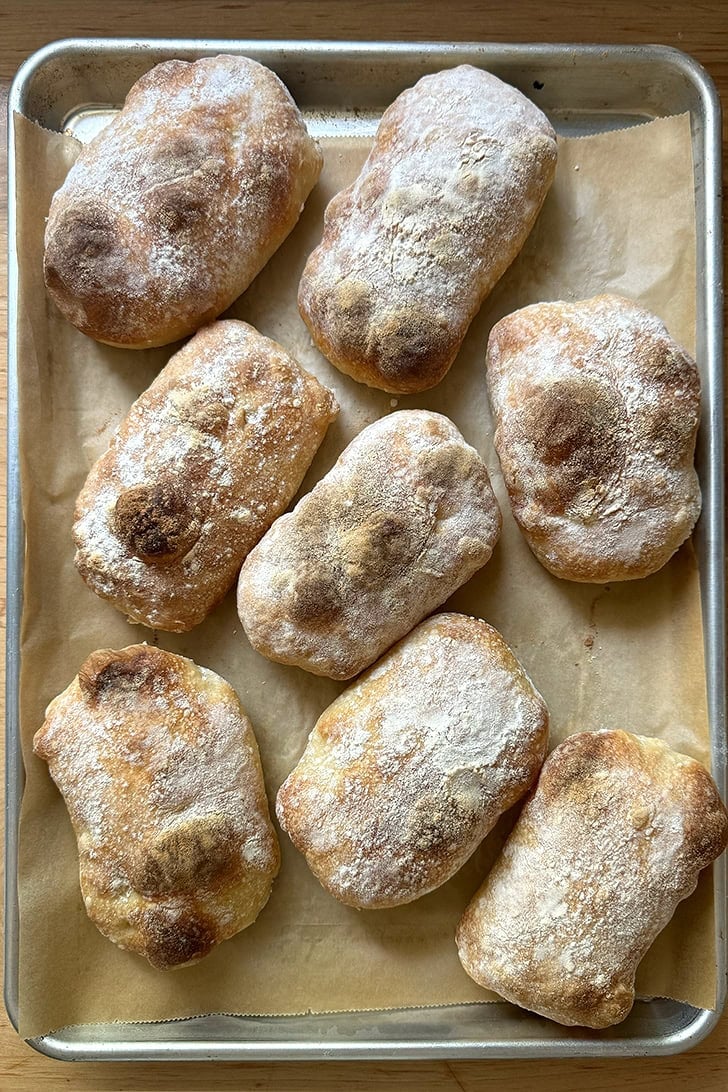
I like to bake one pan at a time, which helps the rolls bake more evenly. Let the rolls cool on the sheet pan:
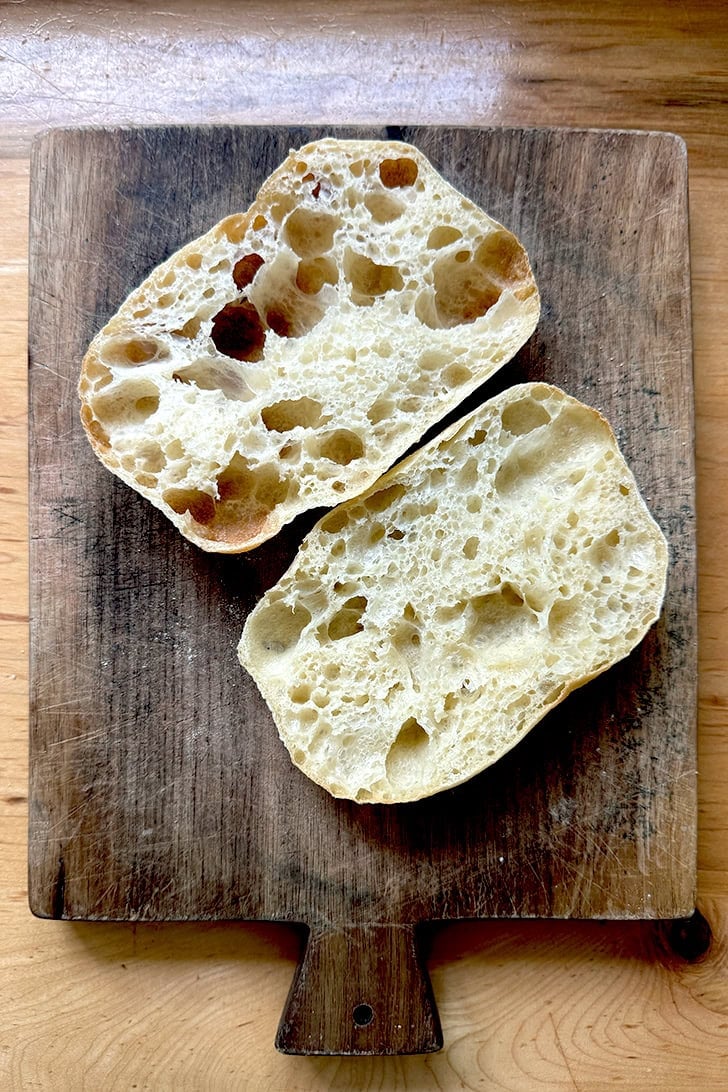
Once cool, the rolls can be halved and filled as you please.
I love these rolls for these balsamic-roasted eggplant and arugula sandwiches.

No-Knead Overnight Sandwich Rolls
- Total Time: 12 hours 20 minutes
- Yield: 6-8 1x
- Diet: Vegan
Description
This 4-ingredient dough takes five minutes to mix together, and from there, time does the work. After an overnight rise, the dough is ready to be portioned, balled up, and baked. Crusty with a light and airy crumb, these rolls are perfect for sandwiches!
Notes:
- Update 9/5: Because this dough is super wet, I’ve reduced the water to 410 grams. If you have made the recipe before and like the higher amount of water, continue to use it. I find the smaller amount of water, which lowers the hydration to 80% makes the dough a little easier to handle while shaping.
- Yeast: In hotter months, you can get away with using 1/4 teaspoon of instant yeast.
- Second Proof: If you have time, extending the second rise at room temperature for 2-3 hours, will create a lighter, airier crumb.
- Sourdough Variation: Use 100 grams of starter in place of the yeast.
- I love these rolls for these balsamic-roasted eggplant and arugula sandwiches.
Ingredients
- 4 cups (512 g) unbleached bread or all-purpose flour + 1/4 cup (32 g) for shaping
- 2 teaspoons (12 g) kosher salt
- 1/4 to 1/2 teaspoon (1 g) instant yeast, see notes above
- 1.75 (410 grams) to 2 cups (439 g) cold water (tap is fine), see notes above
Instructions
- Make the dough: In a large bowl, whisk together the flour, salt, and instant yeast. Add the water. Using a rubber spatula, mix until the liquid is absorbed and the ingredients form a sticky dough ball. Cover the bowl, and let rest for 30 minutes, then stretch and fold the dough — this is an optional new step (1/14/2026), but if time permits, do it: I find it makes for an especially bubby dough. Fill a small bowl with water. Using a wet hand, grab an edge of the dough and pull it up and towards the center. Repeat this stretching and folding process 8 to 10 times, moving your hand around the edge of the dough with every set of stretches and folds. As you stretch and fold, you should feel the dough transform from being sticky and shaggy to smooth and cohesive. Find video guidance here.
- Let it rise: Cover bowl with a tea towel or bowl cover and leave to rise at room temperature overnight or for up to 12 hours.
- Prepare for baking: The following morning (or after about 12 hours), the dough will have risen, and its surface will be covered with bubbles.
- Portion the dough: Spread the 1/4 cup flour over a work surface. Turn the dough out onto the surface. Using as much flour as necessary to keep the dough from sticking to the board and your knife or dough scraper, divide the dough into 6 (155 grams each) to 8 (116 grams each) roughly equal portions: I prefer the size of 8 rolls, and I like to use a scale to portion the dough.
- Ball up the dough: Using as much flour as necessary on your hands and work surface, shape each portion into a ball. Transfer the portions to a floured vessel, ideally something like a lidded DoughMate, to rise. I use two of these DoughMates. Alternatively you could use two 9×13-inch vessels, which you can cover with a sheet pan or plastic wrap.
- Proof: If time permits, allow the balls to rest for 2-3 hours or until they are light to the touch. If you are pressed for time, you can proof for less time.
- Prepare a pan and the oven: Line a sheetpan with parchment paper or a Silpat. If you are baking 8 rolls, line two sheet pans with parchment paper. Preheat the oven to 475ºF.
- Shape: Use two hands to stretch each ball gently into a rectangle—doesn’t have to be perfect—and transfer to the prepared sheetpan, spacing evenly. Let the shaped rolls rest for 20 minutes.
- Bake the rolls: Transfer the pan to the oven. Bake 15 minutes. Remove the pan, and let the rolls cool completely on the pan. Repeat with the remaining sheetpan if baking two pans. Let cool completely before halving and using.
- Prep Time: 12 hours
- Cook Time: 20 minutes
- Category: Bread
- Method: Yeast
- Cuisine: American
This post may contain affiliate links. Please read my disclosure policy.


112 Comments on “No-Knead Overnight Sandwich Rolls”
Hi Ali!
These look so delicious! How do you think using bread flour might change anything? Thank you!!!
Bread flour would be great!
Do you think you could shape these into a hoagie/sub bun?
Yes, absolutely!
Thank you so much for this recipe! I made the dough last night and baked them this morning. I divided into 8 portions so the buns were a bit smaller. The buns are deliciously soft but have more of a dense texture with fewer air bubbles, and the crumb is a bit tacky. The tops are quite pale. Could this be a result of overworking the dough in the shaping process, and/or underbaking? I’m not an experienced bread baker so I followed the recipe to a T, timing and all, on this first try. Any insight would be appreciated! Excited to eat the fruits of my labour this week and to try this one again!
Hi Rebecca! Apologies for the delay here. Questions for you: are you using a scale to measure? And what type of flour are you using?
Regarding the paleness, next time try baking them at 450ºF for the entire time.
Next time, you can extend the second rise: it’s possible the rolls need to proof for longer, more like 40-60 minutes before you bake them, especially in these colder months.
No problem at all! Thanks so much for your reply. I’m using a scale to measure, and I used Robin Hood AP Organic flour (only one I could find that was unbleached). I’ll try these tips next time. It’s quite cold in our place (Ontario winters!).
Unbleached is perfect! Let me know how the second round goes 🙂
Can I sub have Srpouted wheat flour for AP flour for the sandwich rolls? There is a slight chance the rolls will be denser, but I’ve had great success with sprouted wheat flour, so go for it 🙂
Yes!
Can this dough be kept in the frig longer and portioned out as needed. It is just my husband and I.
Yes! Just be sure to store the dough in an airtight container to ensure it doesn’t dry out. If you don’t have a container, you can slick the surface of the dough with olive oil, and cover the bowl with plastic wrap.
Just discovered this recipe last night and the rolls are baking as I type! Planning to serve them for lunch with leftover chicken piccata and pasta (using your pesto recipe with homegrown Thai basil). THANK YOU as always for your wonderful recipes and making me look like the home lunch hero!
Woohoo! I hope they turned out well, Kelli! Chicken piccata + pasta with Thai basil pesto sounds absolutely heavenly! Thank you for your kind words 🙂 🙂 🙂
Hello Ali,
I love your website and enjoy your recipes. This recipe calls for instant yeast. I don’t use instant yeast. Is it possible to use active yeast after it has proofed or is this recipe different?
Thank you.
Yes, absolutely! Go for it 🙂
I have made these rolls as directed, they are excellent for portobello or other sandwiches.
I am thinking of making them for a Christmas Eve appetizer spread in a smaller slider size. What should I do differently (besides the portion shape and size)?
Great to hear, Barbara! I don’t think you need to do anything differently, but I might consider shortening the bake time, though not by much — 5 minutes or less depending on how much smaller you are making them.
what if they stay in fridge longer than 12 hours more
like 24 hours
?
Hi! Do you mean the initial rise? Or the shaped rolls? The initial rise is at room temperature, but if you wanted to shape the rolls and stick them in the fridge, that would work, too. And they would be fine for 24 hours as long as they are in an airtight container.
I prepped these last night and baked them this morning. We used them as sandwich rolls and they were delightful! My husband raved about them all day!
I was curious about doubling the recipe – anything I need to be aware of?
Thank you!
Great to hear, Micki! Thanks so much for writing. Nope, no changes need to be made when doubling. Go for it!
Holy guacamole these are easy and delicious!!!
Great to hear, Sarah!
Every one of your recipes (and I mean EVERY ONE!) that I have made have been fantastic. Your directions are clear and well written, and the results are delicious. It’s at the point where I always check your site first when I need a recipe. THANK YOU!!
Awww thank you 🙂 🙂 🙂 This means a lot. Thanks for writing.
I’ve been making these for years, since Ali posted the recipe around 2016. They’re really good! I’ve used them for sandwiches but more often than not I treat them as little loaves of bread: tear them up, cut them into slices and chunks, toast em, make croutons. These seem to keep better and are more handy and appealing (to me!) than making a loaf of bread. Your mileage may vary. Versatile, tasty. Superb ratio of ease to deliciousness!
I use a lot of flour for working them into shape to keep them from sticking to my hands and the work surface. I gently roll them around on the cutting board in the flour so they’re easy to handle. I make mine with King Arthur organic bread flour.
So nice to read this, Jericho! Thanks so much for writing and sharing these notes. I love the idea of using them as little loaves and then for croutons. Yum 🙂
I make these frequently but instead of an overnight rise (not always planning ahead as I should) I sub a cup of light lager beer for half the water and bump up the yeast to a tsp. Gives a great flavor.
Smart!! Great to read this Gale. I will try that!
Can you yell me about how long these are? Do you think these would be good for making say…an italian sub? If these are 6” or less in length, do you think I could cut dough into thirds and make longer? Would I bake the same amount of time?
Hi! Apologies for the delay here. If you are looking for longer rolls, I think cutting the dough into thirds is a good idea. And yes, I’d bake them for roughly the same amount of time.
Quick question after the bulk ferment step. In your narrative description you write “punch it down on a well floured surface and portion it out” yet there is no mention of the “punch it down step“ in the recipe section. Could you clarify? Also, do you shape the portions into balls as if you were making pizza balls or just create the bun shape?
Thanks in advance. I love the Pizza Night Cookbook – it has upped my pizza game as has the baking steel I’m slowly working through the book and site with great delight
Hi Keith! Sorry for the confusion here. When you turn the dough out onto your floured work surface, you’re essentially punching it down then… it will completely deflate when you turn it out. I will edit the post/recipe to clarify.
And yes, I do shape the portions into balls. I will edit this part of the recipe, too.
I’m likely not getting to you in time, but I’ve been using this recipe to make giant sandwich rolls. I wrote about it in my newsletter on Saturday and shared the recipe in this Google Doc. I am going to make the smaller rolls (as per this recipe) again this week, but I think I’ll extend the final rise to be 2-3 hours, which I think will make for a much lighter crumb. Because the second rise will be much longer, I’ll place the shaped balls in a DoughMate container or a floured 9×13-inch baking dish covered with a lid or plastic wrap.
Thank you for your kind words re Pizza Night. Means so much 🙂
I made these yesterday and had a question. They looked beautiful. The top halves were exactly how I wanted them to be. Light. Airy. perfect for sandwiches but the bottom half of each roll was dense. We ate the bottoms as toast and they were delicious but I just was wondering if you had any suggestions. Thanks!
Hi Verity! My only suggestion would be to extend the final proof. After you stretched the round into an oval, how long did the dough proof for? And are you using an Xlarge sheet pan or a half sheet pan?
Thanks for this recipe and the giant sandwich loaf – both of which I will make in the coming week 😊 Is it possible to make these buns using sourdough starter in lieu of commercial yeast? Thank you. Also love the pizza night recipe book ❤️
I think so! Do use the updated recipe on this post however. For sourdough, I would use 50 grams of starter. Omit the yeast. Keep everything else the same.
Thank you so much for this wonderfully simple recipe! I’ve made it several times usually making six rolls and they come out great every time. So grateful, thanks again!
Great to hear, Alivia! Thanks so much for writing and sharing this 🙂
I always love your recipes. So well thought out and explained. Ideally, I’d love to parbake these, then freeze them, and then bake 1 or 2 at a time from frozen. There’s a product I buy locally that’s like that—the bake from frozen is about 8-10 minutes at 450ºF. Do you have any suggestions for doing that with these?
Thank you, Nancy 🙂
I think you could make them for 10 minutes, remove them, let them cool completely then freeze. I am not sure, however, how they would bake straight from the freezer as I have not tried this. I think you would have great success baking them from a thawed state for the time/temperature you suggest. Would love to hear how they turn out if you give it a go, especially baking from the frozen state.
Thanks, Ali. Given that I’ve been successful with commercial par-baked rolls, baked from frozen, I’m definitely willing to try it that way. I’ll let you know.
Having trouble with timing. No problem with the overnite counter rise but an unable to shape, proof and bake the first thing the next day. Can I put the dough in the frog the next morning then take it out later in the day to shape, proof and bake? Or another possibility – let it rise on the counter for a few hours then go into the fridge for a long cold rise and bake whenever the next day. If so how long on the counter? Thanks so much. Love your pizza book especially with my baking steel.
Great to hear about Pizza Night, Bonnie… thanks so much 🙂
Regarding your question: “Can I put the dough in the frog the next morning then take it out later in the day to shape, proof and bake?” Yes! Always use the fridge as needed when baking bread. Bonus: The cold dough will likely be a little easier to portion/ball up.
I plan to use this recipe to make square hamburger buns, using sourdough starter. At the shaping stage, I will stretch the dough to fill a sheet pan, and use a bench scraper to score the dough into squares (probably 8). Otherwise, follow the recipe.
Do you foresee any problems? Anything else you would change?
Thanks. Love your emails.